Creating more space in my craft room

A chance conversation with MOH started this. I partly joking said that I needed more space in my craft room as even with two desks I didn’t seem to have enough surface area - I know. He quickly surveyed the situation and the mess (or as I call them organised piles of projects) and pointed out that if I didn’t have the large storage chest then I could fit in another desk.

Clearly losing the large storage chest (which was our laundry basket in our previous house) wasn’t an option, and also clearly he had no idea of the amount of junk, or as I prefer to call them useful things and future projects, that it held.

No way was that happening José!

But it did start me thinking…

And measuring…

And I realised that I could do both, and relatively simply too. I worked out that I could still access the large storage chest, and have a desk above it.

A plan started to develop

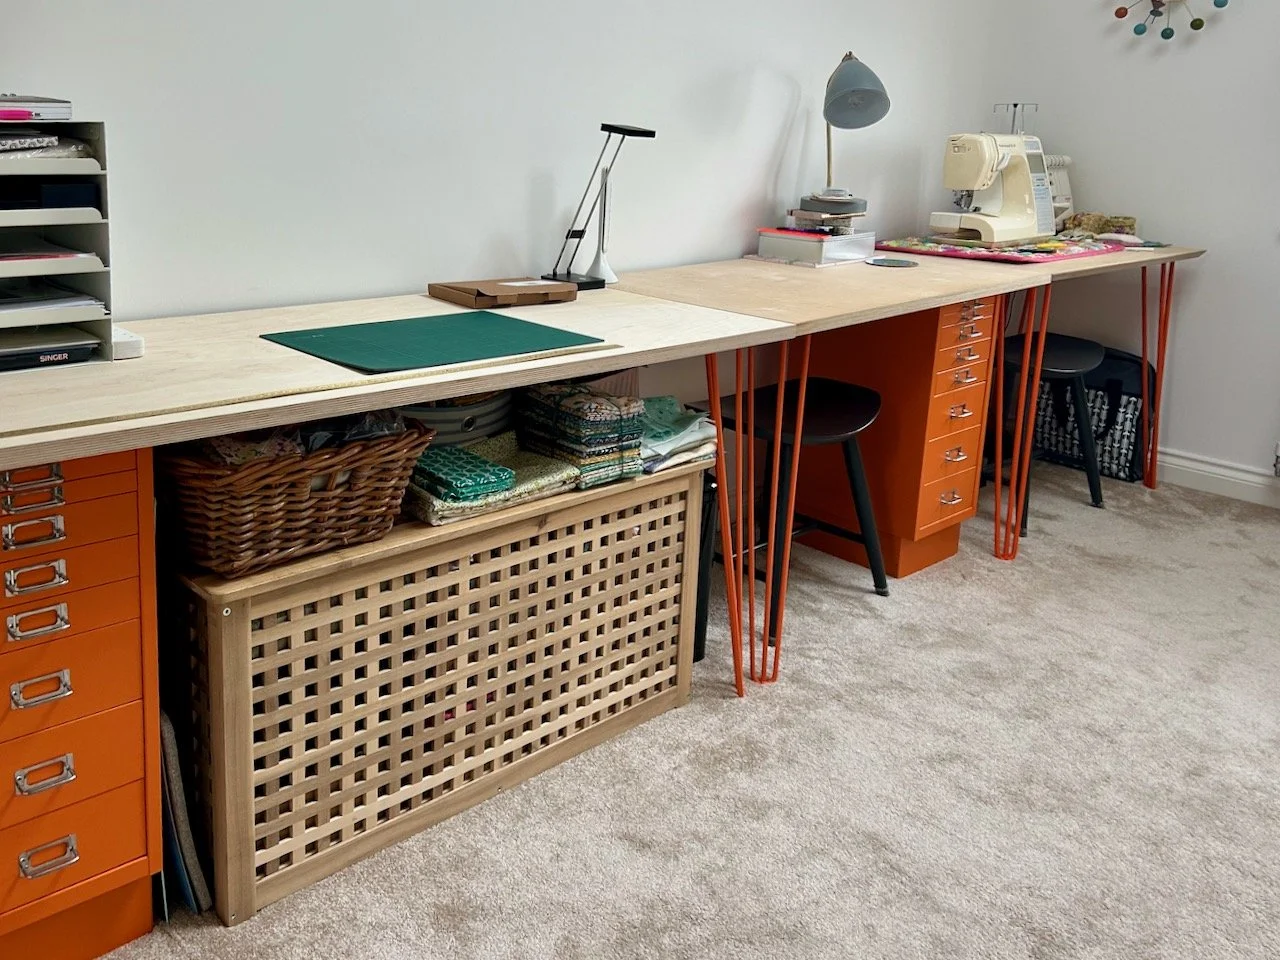
When I bought my two sets of Bisley drawers I’d bought one with a plinth and one without. The plinth raises the drawers to a standard desk height, and my thinking was that if I needed another plinth in the future then I could buy one then. So I did.

At that time I also bought a set of four hairpin legs when to create a space to craft, and the plan was originally to sell the extra legs on - but thankfully that hadn’t happened and they were still in the box, still in their bubble wrap and in our spare bedroom. Phew - as they were about to be brought into action.

So by adding a plinth and using the legs I already had, all I needed was the desk top, and one that could be cut to size. I bought this from the same company as before but this time a larger length of marine ply was ordered. This wasn’t cheap - but all wood prices seem to have sky rocketed, just like everything else..

When it arrived MOH noticed it had taken a bit of a bash on one corner, and while the company offered to send a replacement I was keen to get my room sorted out and didn’t want to wait any longer. And what would I do with a spare desk top? Plus I’d worked out that I could put the bashed corner on the underside at the back and then it wouldn’t really show anyway. So I agreed a part-refund with the company, and MOH was in business.

I was hoping to get away without moving the large storage chest - but I wasn’t sure if I’d be lucky or not. Just in case though I decided to rearrange it, as don’t tell anyone but I’m not sure even I knew what exactly was in there. And as you do, I found some right treasures once I started sorting through it.

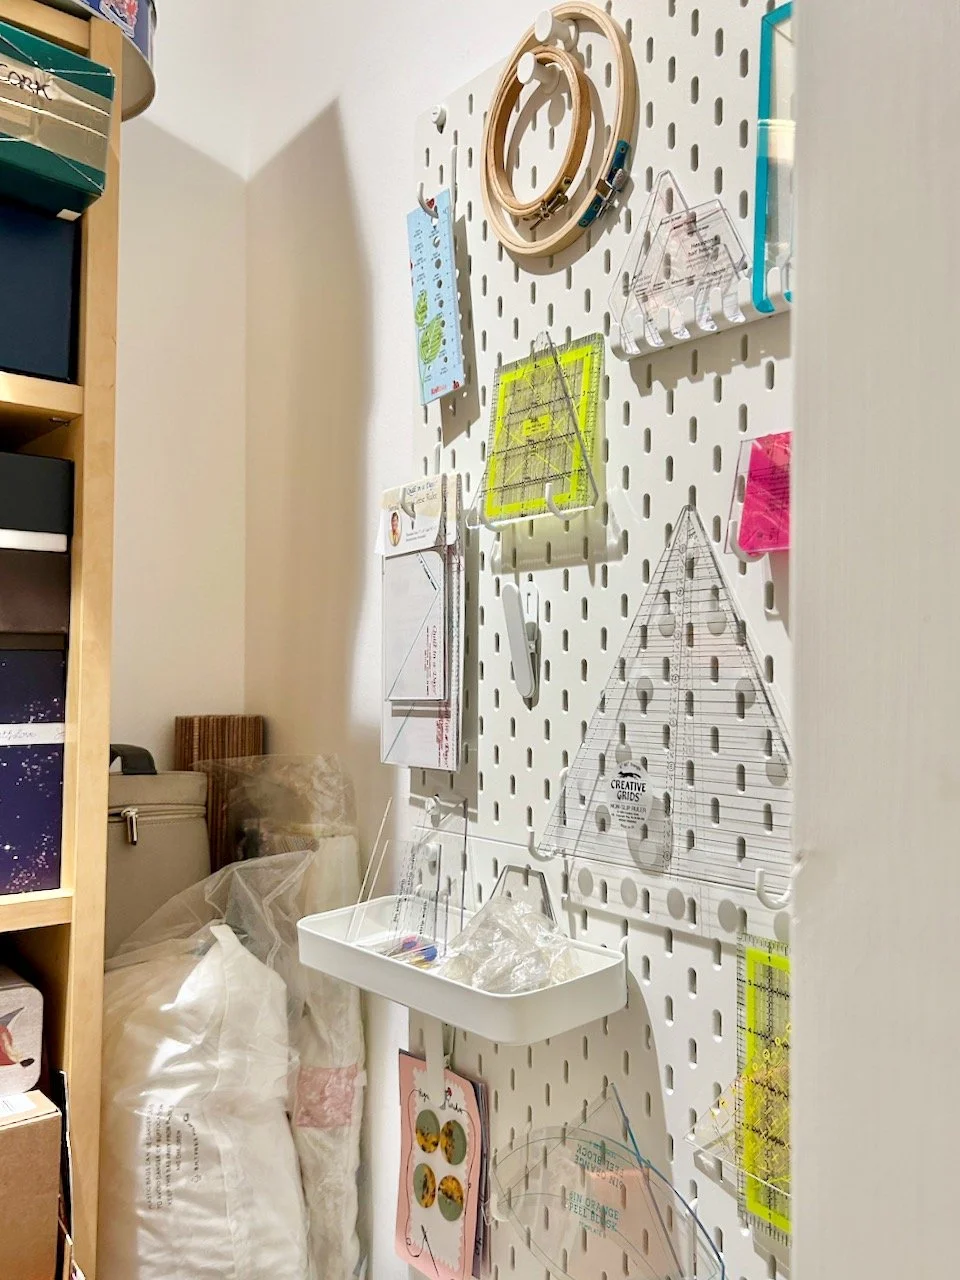
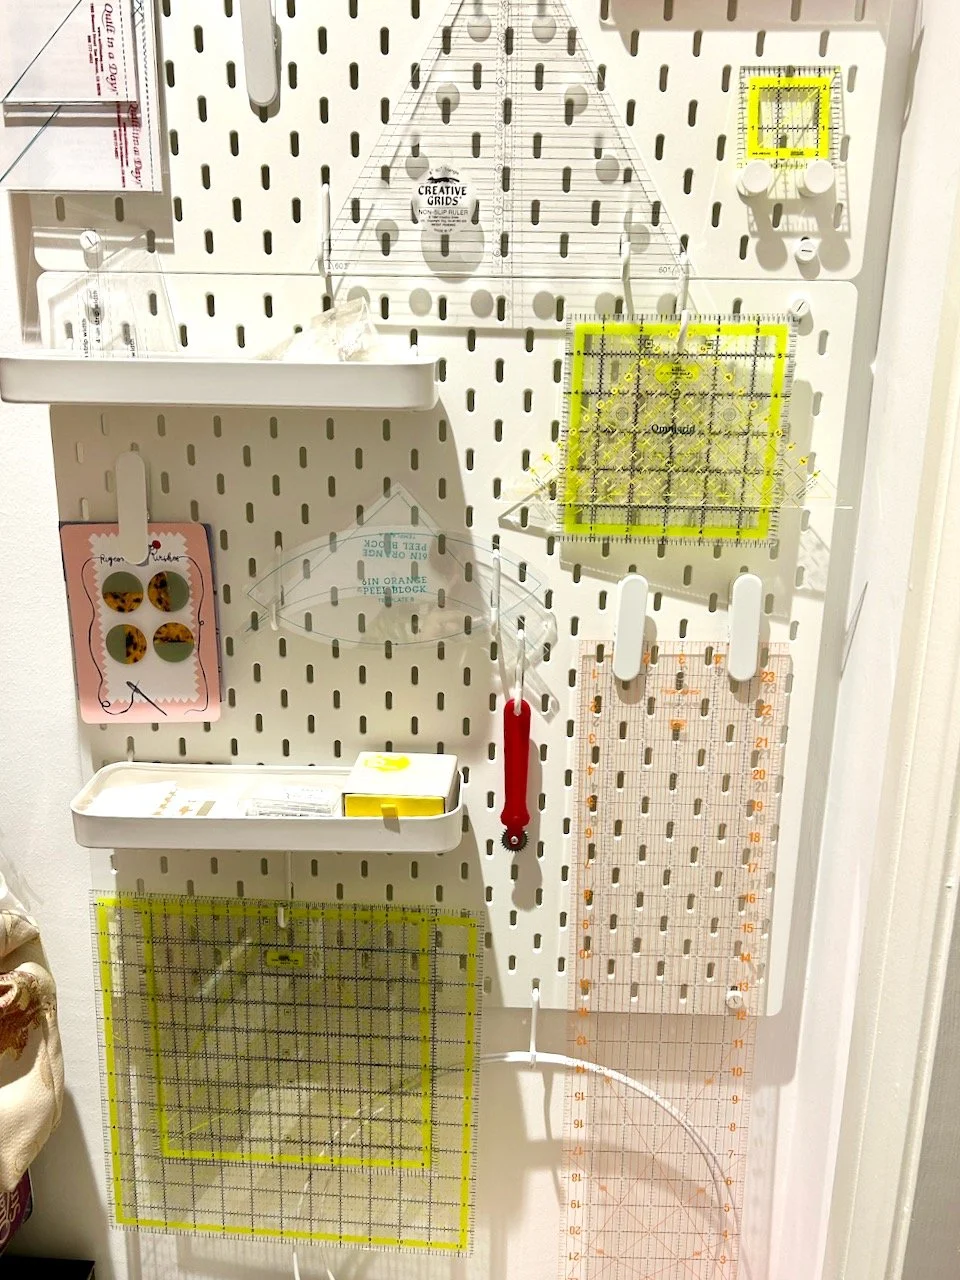
It’s now much better organised - the fabric is in storage baskets that I can lift in and out easily - and I mostly know where things are, which will make retrieving things much easier too. I also thought it prudent to do this before the desk top was in place as sorting through these things is never a quick job is it?!

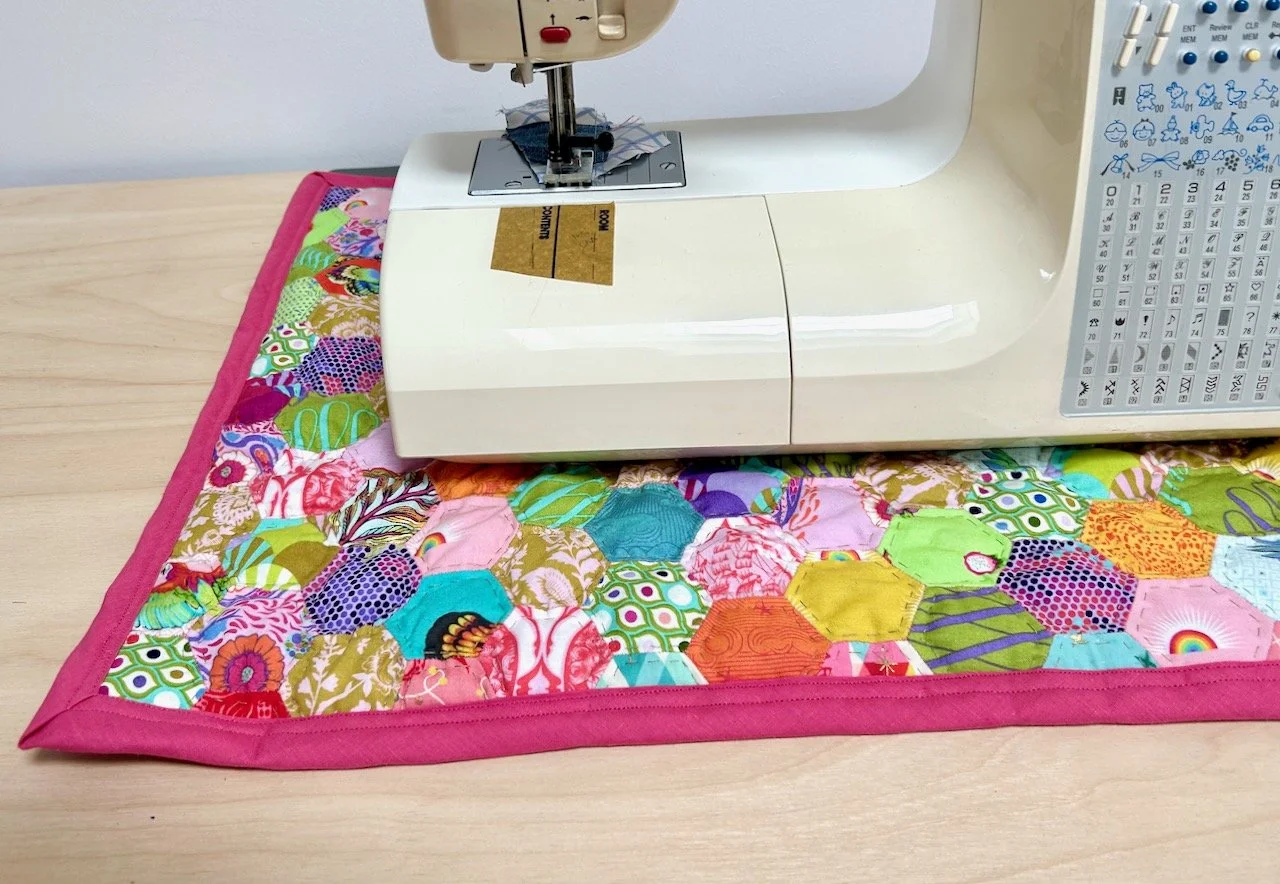
I also took the opportunity to switch around my existing two desks to make better use of the space. So my sewing area is now closest to the window, and my overlocker machine is happy to sit in the far corner of the desk which keeps it out of the way, but close enough for it to be handy too.

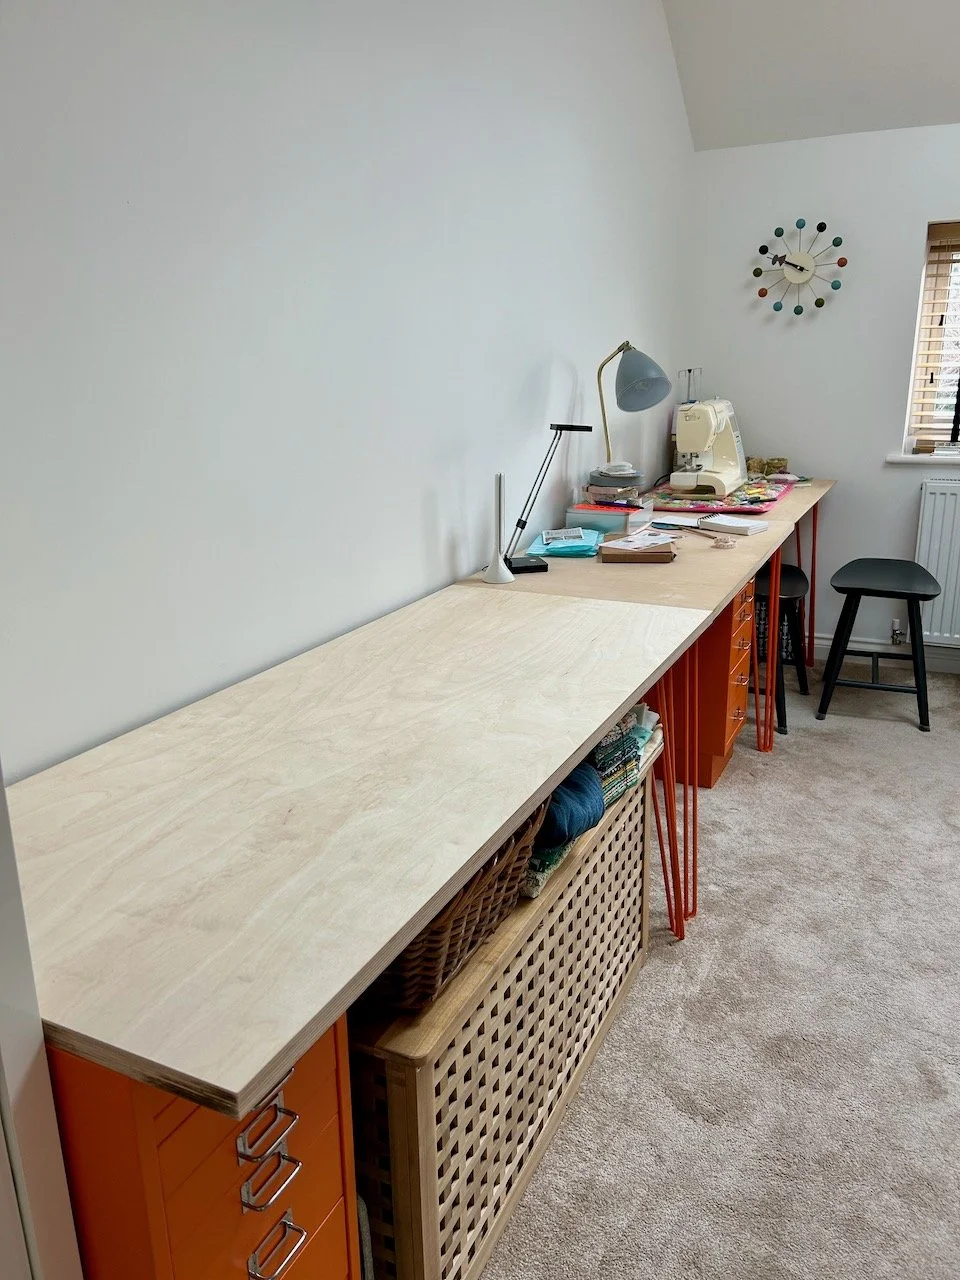
I was lucky, as I hoped I would be, and the large storage chest didn’t need moving with the new desk slotting in around it. I’m putting that down to a lot of luck, as well as precise measuring! It wouldn’t have been a deal breaker if I needed to move it as I had some space at the far end of the run of desks, but if I didn’t have to move it then that would be a result.

This arrangement also gives me space on top of the large chest for my current projects, and the room looks so much larger - and I’ve even got all my junk, or tools as I prefer to call them, on the extended space too. And I checked with the desk top in place I can still get things into and out of the large storage chest - though I did knock my head the first time I tried it, but I’ll learn!
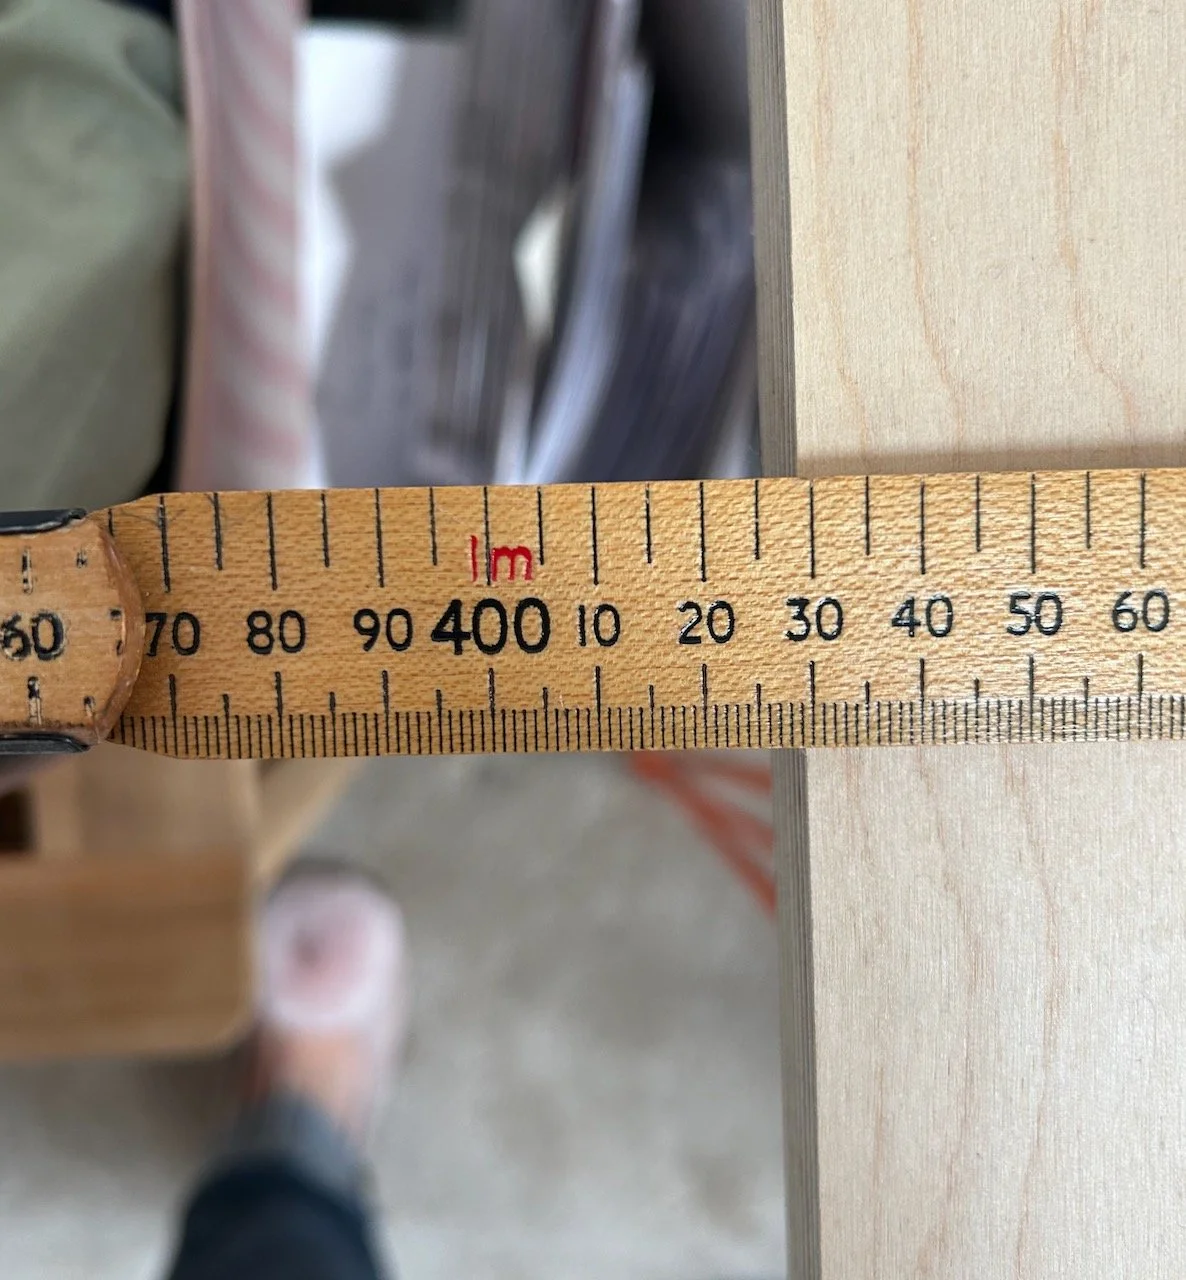
The final metre

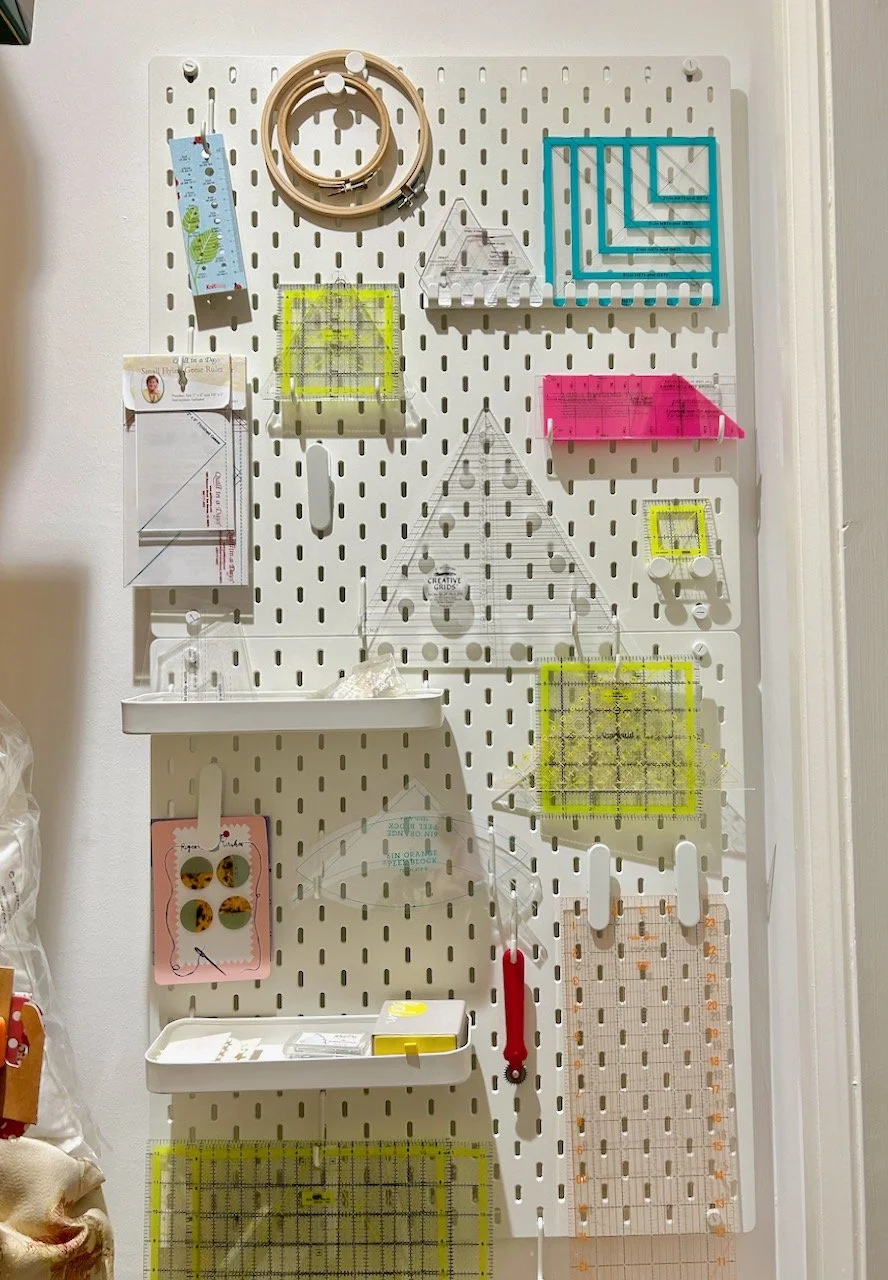
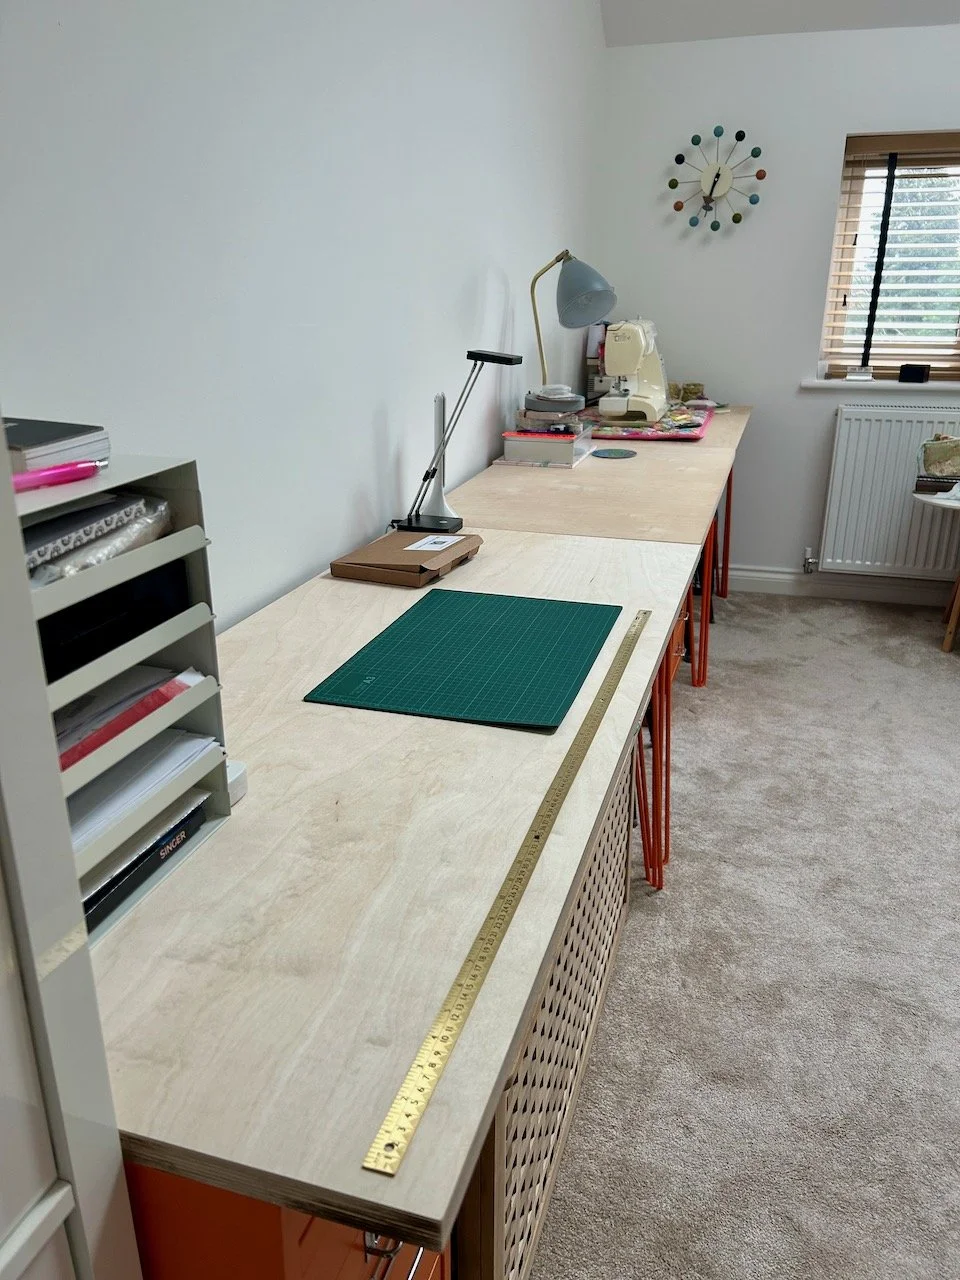
I haven’t yet decided on the exact location for the brass 1 metre/1 yard rule as I’m working out if it will get in the way where it is or not. I think not, but I’m going to leave it unsecured for a little while to make sure it doesn’t.

I’ve also added my paper tray in the corner at the near end (which also covers the small dented end), which now acts as a handy place to stow my mini iron. One of the things I was really keen to add was a counter top extension lead - so there’s no more scrabbling under the desk for me to plug in my iron (though on the plus side at least I always knew I’d turned it off!).

As it worked out there’s also a gap between the first set of drawers and the large storage chest which is ideal for both my craft mats and the wool ironing pad - it’s almost like it was planned. And at the other end of the large storage chest, nestled between the hairpin legs (but not on show) is space for the shredder, which previously didn’t really have a useful home.

The only small issue I had by moving my sewing machine was that I kept backing into the small white round table - and that was almost looking for a new home, but in the end I moved my peacock easy chair enough of a smidgeon to stop that happening, so thankfully the table had a reprieve!

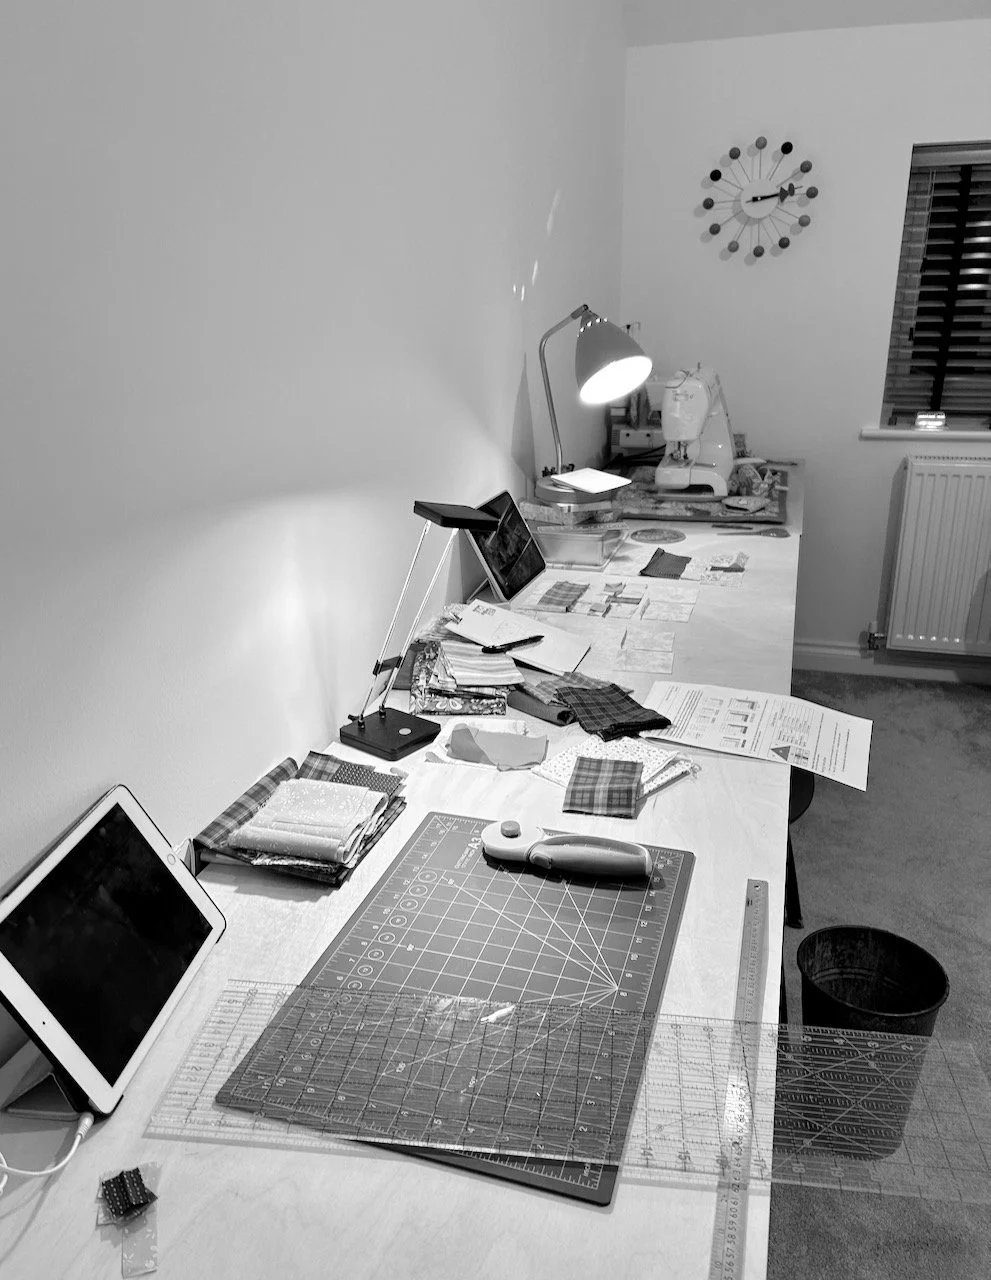
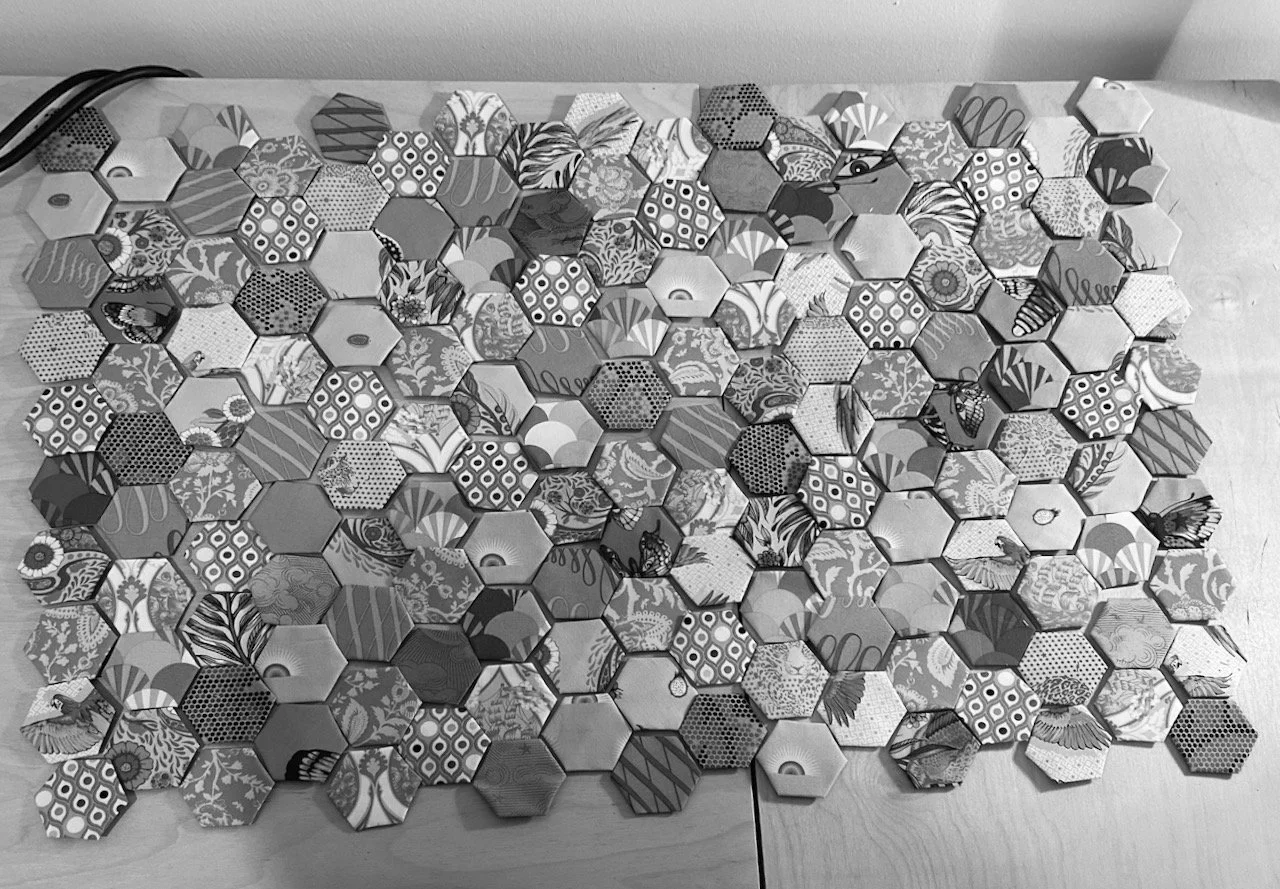
Needless to say I’m loving this small tweak and it’s getting plenty of use - and that means it isn’t always as neat as it once was - hence the black and white photo!

Finishing my new hexi sewing machine mat

It’s been a while since I shared how I’d fallen for some of Tula Pink’s bright designs, but since then there’s been a fair bit of activity and I’ve even finished both of my intended makes; one fully, and the other the sewing element is complete, but I’ve still to find the right kind of day to get my paintbrush out.

Today I’m sharing the fully completed project, which wasn’t even a twinkle in my eye back at the start. I enjoyed the whole English Paper Piecing process so much that once I’d finished the top for my sewing box, I wanted to carry on.

And so I did, and the result is a gorgeously bright mat to go under my sewing machine. Not that I really need a mat, but it will prevent any marking on the surface and I’ve got used to having my sewing machine on a mat. I’d been using an old and worn out cutting mat, and that helps me move the sewing machine back and forth on the desk when it’s not in use.

But it wasn’t very pretty. The finished mat is way prettier, and I’m really pleased with how it turned out.

The finished mat edged in raspberry bias binding on my desk, complete with sewing machine

An organic plan

I didn’t have an exact plan when I started, other than to create a mat for my sewing machine. I knew I wanted it roughly the same size as the old and worn cutting mat I’d been using, but I hadn’t really worked out - at the start anyway - how I was going to finish it, if I was going to quilt it (or how), and what the backing would be.

I knew I probably had some batting somewhere, so that was covered and I knew I wasn’t keen on having the hexagonal shapes on the edges, so I was always going to square those off somehow.

But when I started, finishing this mostly hand sewn project seemed a long way off.

Yes mostly hand sewn.

All of the piecing and quilting on the colourful front is done by hand. The binding was added with two rows of machine stitching on the front, and attached to the back by hand sewing slip stitches all the way round.

The back though is mostly machine sewn, the strips pieced by machine and also quilted by machine. And you know what, that’s perfectly ok.

Starting out

Back in January I needed to crack on with assembling enough hexies, and deciding on a layout - and the layout was probably the hardest part!

Testing a layout - in curved stripes in graduating colours

In my head I thought I’d create a colour graduating design, which would look both slick and chic. But try as I might, it didn’t feel right - and so I abandoned the layout above, and adopted a more random placement design. Switching individual pieces around to get a layout that I was happy with - don’t get me wrong, there was lots of switching, trying to get the different patterns evenly spaced.

A random placement design of hexies - much more colourful!
Testing the random layout in grayscale to check for overall colour distribution

Once I’d decided on my layout - and taking a picture so I didn’t forget it, I did the clever design trick of looking at the photo in grayscale to ensure that the lights and darks were also relatively evenly spaced.

And then I numbered every single hexi with its row and position so that sewing them together could be relatively mindless. With rows for each stack dotted around my craft room, at times it felt like I’d never reach the end.

Each pile of hexies representing a single vertical row in the random layout

Front assembled, now for the back

But gradually the individual hexagons were attached into rows, and the rows sewn together in order to create the front of my mat. I decided to fill in the gaps on the top and the bottom, but to leave the smaller gaps on the sides.

And I settled on the backing fabric too. I wanted something equally colourful, but something that would come together much more quickly, and nor did it need to be quite so labour intensive.

Front and back - top is the random layout front, bottom is strips of fabric from a 'grab bag' machine sewn together

In the end I settled on some of the less Christmassy fabrics that I’d picked up at the Newark Quilt Show at the start of the year. All of the fabrics were part of a ‘grab bag’ and a lucky dip. Part of their attraction for me was their selvedges, so I was keen to keep these on show.

The striped finished back with a strip design, quilted in straight lines

I’d slightly misjudged the size making it longer than it needed to be, but not as wide - so with my organic plan and solutions brain mode, I added part of what I’d cut off the bottom onto the side - which you can see on the left above - and that makes me smile.

Hand quilting the front

With the back complete - sewn together, and machine quilted - I could no longer procrastinate about how to finish off the front. At one local sewing group evening one of the ladies asked me if I was going to hand quilt my piece - I laughingly said no, I’m not a glutton for punishment.

A closer look at part of the hexies on the front with hand quilting - running stitch on most, chain stitch on some

However, it turned out that I am - as it needed some kind of quilting, and I thought machine quilting this side would lose some of its charm. I started out with a plan to chain stitch individual hexies to form an oblong shape, and I completed the inner oblong. But realistically, it took way longer than I wanted it to take and it didn’t look as good as I thought it would. I wasn’t unpicking it though.

So instead I changed tack, and added a small running stitch around the remaining hexies using the same embroidery thread.

Adding the binding and elastic

As I neared the end of the hand quilting I was thinking of how to finish this project - by chance I saw a haberdashery company online showcasing their widest bias bindings, and I was hooked. I did a rough calculation of how much I’d need, then added a bit more for good measure and waited for it to arrive.

I hadn’t thought about thread, but thought I’d probably have something. Turned out that I did, and in exactly the same colour - what are the chances? I’d picked up a bag of part-used overlocker threads in a recent WI sale in Newark - attracted by some of the colours, thinking I’d use them at some point without knowing that would be quite soon!

By now both the back and front were pinned together and so I pinned and re-pinned the binding to the front of my mat, mitring the corners as neatly as I could, adding extra pins to keep them in place before I slowly (at times) whizzed round with a couple of rounds of machine stitching.

Bias binding and a mitred corner with two rows of machine sewing attaching it to the front of the mat

With a stroke of luck the mitred corners behaved and stayed in place on both the front and the back. For the back I added some glitzy pink elastic (left over from mask making during the pandemic) across the corners and then pinned the back in place before slip stitching it and completing my mat. The elastic means I can slip the corners of the old and worn out cutting mat through these and get the benefit of its solidity, but the prettiness of my new mat. Not something I originally planned for, but a useful addition.

The rear side of the mat with elastic across the corner and hand stitched binding

Definitely a project to take on the go

For now my English Paper Piecing (EPP) projects have come to an end, but it’s something I’ve really enjoyed - and it’s something that is easily portable. The mini oblong pouch below - which is no more than 15cm long - carried everything I needed easily, that includes needle and thread, small scissors, a thimble, a thread catcher and approximately four rows of my hexi top. That’s where the row and positional numbering came in handy too - that’s definitely a top tip, write these on the back of the cardboard - mine took the format 6.1, 6.2 etc for row 6 position 1, position 2 and so on. Absolutely invaluable, unless of course you are creating a truly random design.

A selection of hexies secured with elastic bands, a mini pouch, needle thread, scissors and a thimble

So my new sewing mat looks good, is functional and is in place in my craft room. Now I need a day to paint my sewing box charcoal - I have the paint already. I need a day that’s not too hot, not too cold and one where I haven’t already committed to other things! Then I’ll share the other half of my EPP Tula Pink creation - don’t hold your breath!!

PostCommentLove

Getting organised with pegboards in my craft room

I’d had my eye on some pegboards for my new craft room since the room itself was a glimmer in my eye! Initially I thought we would make them up ourselves so that they could be truly customisable for whichever space I chose, as it really couldn’t be that hard. And if I had a truly awkward space I don’t think it would be that hard, but once I’d worked out where I wanted to put my fictional pegboards, and once I’d seen the IKEA Skadis pegboards and how flexible they were, there was no other choice for me.

I decided that my pegboards would make the best use of a blank wall inside the small walk in cupboard in my new craft room, which would also be the ideal way to store my quilting rulers. Since we’ve moved, and I’ve unpacked my craft room, they’ve not really had a dedicated space and nor were they all together. But that soon changed!

What I chose: pegboard size and accessories

Our house is a new build, which means there’s a lot of white - and for a self-confessed colour addict, surprisingly I’m ok with all the white, so for me it was always going to be the white version, although the black colourway would also have worked. I opted for two 56x56cm square pegboards, while I did have room for one of the larger size I wanted to keep some space clear, as that’s something else I’ve come to appreciate with our new house - we don’t have to cram it full of stuff, and the same goes for this small walk in storage space.

As I was ordering online I was keen to get the pegboards and accessories in one shop, however I didn’t really know what would work but given that the accessory pack prices were under £5 I decided to chance my luck.

The accessories I opted for were:

  • Two packs of Skadis shelves, £4 each

  • Two packs of Skadis clips, £2 each

  • Three packs of Skadis hooks, £2 each

  • A single Skadis hook rack, £2

  • A pack of 5 Skadis push in hooks, £1

The final addition to my basket was the connector for Skadis pegboards, which was recommended when hanging two pegboards side by side (or in my case top to bottom!).

So for just under £50 I was able to bring a whole lot of order into a space which would otherwise have little use - and now that it’s finished it’s not only useful, but it’s a pretty and practical addition too.

Two IKEA Skadis pegboards joined together and hung inside my built in cupboard - it stores crafting supplies, including craft rulers and shaped templates
My view from the cupboard door - pegboards on the right, and a space between the Ikea kallax unit and the wall

MY SKADIS PEGBOARDS BRING FUNCTIONALITY TO AN OTHERWISE UNUSED SPACE

Even better though I guessed just about right on the accessory front. I used most of the ones I bought - though I did have a few challenges along the way. I naively assumed that all of my acrylic quilting rulers and templates would come complete with a hole to hang them from. That wasn’t the case, especially for those which came as free gifts from magazines, and some which I’ve had for a long time (I reckon I’ve had my Fiskars ruler - the one bottom right in the photo above - since the early 1990s), so the hooks weren’t going to work for those, or at least not in the same way.

Thank goodness for creative thinking though!

I was able to position some of the hooks so that the templates could balance on top of the hooks, and used the clips for the long Fiskars ruler, which I still probably use the most. I realised I had little use for the hooks on the hook rack, but the rack itself was useful to hold more templates.

The trays bring a 3D element to the pegboards, and while I’ve used them to store smaller templates and the hooks I’ve not yet used, I’m not sure if I’d opt to buy these if I were to do this again.

The top half of the board with embroidery hoops and craft rulers and templates
Focusing on the lower half of the ikea skadis pegboard which also holds craft supplies but allows the rulers and templates to hang below the last space

I’m glad I opted for two of the smaller sized pegboards - and the connectors were an absolute gem according to MOH who was tasked to put these on the wall for me. As well as the feeling of space, I can use the whole pegboard making use of the space below as well with the rulers, templates and metal rings I bought to make some crocheted mandalas (one day!) hanging off the bottom.

I’m so pleased with how these turned out, and how it’s made a space that usually wouldn’t be used into a functional feature. And yes, I’m using the rulers and the space is still this tidy!

PostCommentLove