Sharing the pouch love!

I promised more pouches, and more pouches there will be - though this is just a few of them, there’s plenty more to come. In this post though I’m sharing the pouch love and all of these were gifted to relatives over the last month or so.

Let’s start with the smallest ones

This year we decided that cash would probably be the most welcome present for our nieces and their partners, but I also wanted to do more than pop it into a card. Many years ago I wrapped some cash up with some chocolate, and they were obviously much younger but the cash was discarded in favour of the chocolate (you can tell we’re related!) and so I was keen to avoid that, especially as there’s more of us now which means there’s a lot more wrapping paper to sort through!

Anyway I thought the pouches with the vinyl fronts would work, but smaller. And so I made one half the size of the smallest one I’d previously made - opting for the easy maths every time - but it was a bit too small. So I went midway between the two measurements and ended up with two pouches that size, alongside the smaller one.

I was happy, and so were the recipients though I think they were most happy with the cash inside. My 4 year old great niece was probably ambivalent about receiving the smallest one (even with a £1 coin in) as let’s face it at that age there’s much more interesting things going on.

Repurposing an old shirt

Even MOH didn’t escape, though I took a different approach here as I knew he’d say he didn’t want/need one - but as you know that’s never the right answer to the pouch question. I decided that by using one of his old shirts (which he’d already discarded and I’d claimed as ‘potentially being useful at some point in the future’ I should add) he couldn’t argue that it wasn’t his thing.

I can be canny like that.

He’d said that he tends to keep his coat on while on the train even though it can be too warm as he hasn’t got anywhere to put his phone or wallet… I told you the answer to these types of questions is “you need a pouch for that!”

And so I made him a pouch for that, whether or not he’ll use it is another matter but I know it’s been with him on his recent London trip. So that’s at least part of the battle.

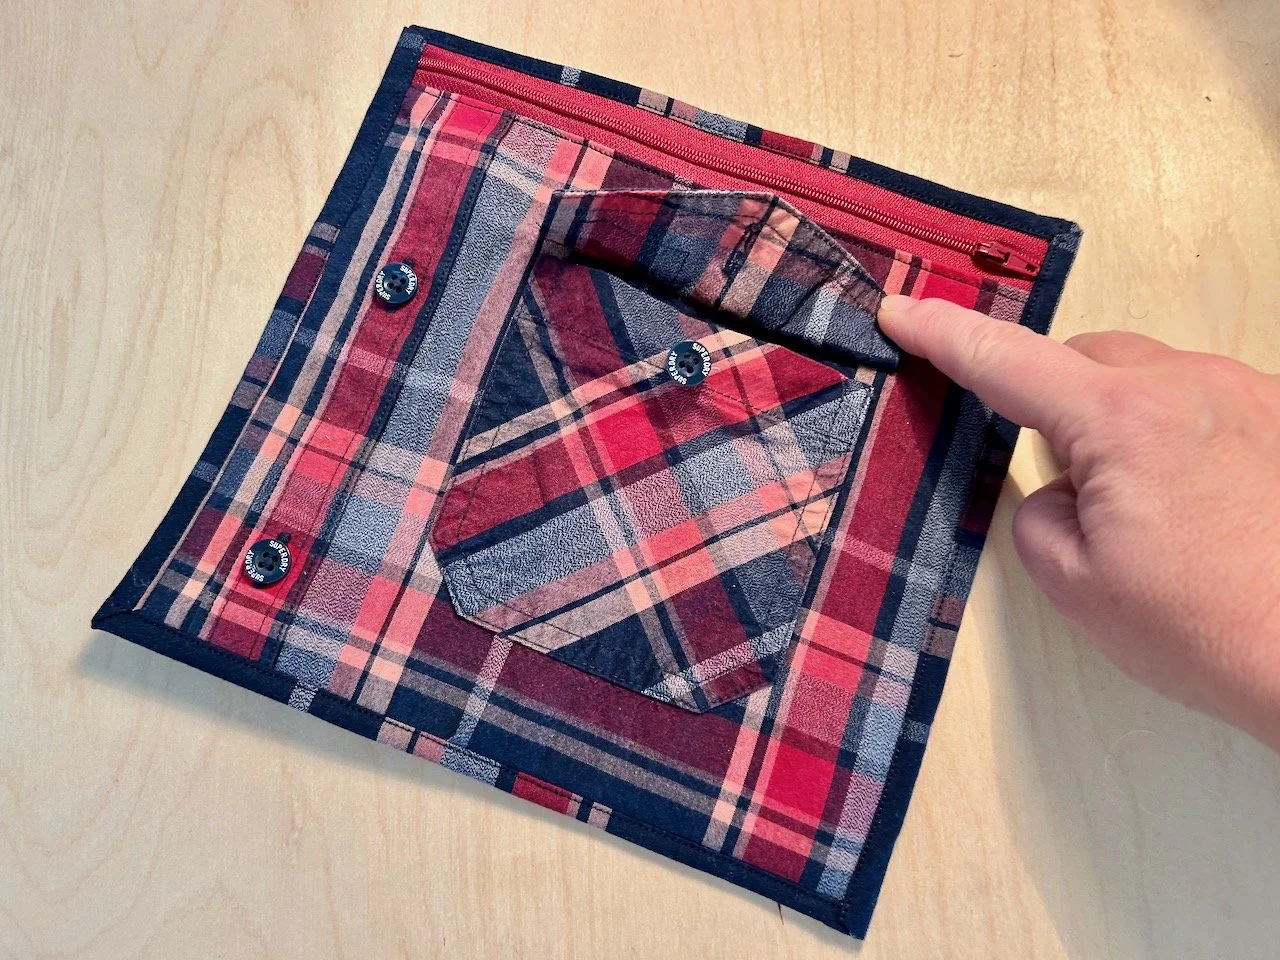
For this one I cut one side of his old Superdry shirts, using the breast patch pocket and the buttoned placket, which I sewed closed before assembling the pouch. I left the pocket functioning as a pocket, thinking that it would add interest and may actually also be useful. Along with the same material for the back, and a toning zip I followed the same process as for the vinyl fronted pouches, now fully confident about the size changes. I’ve worked out the back needs to be about 1.5 inches bigger than the front to allow for it to wrap around to the front.

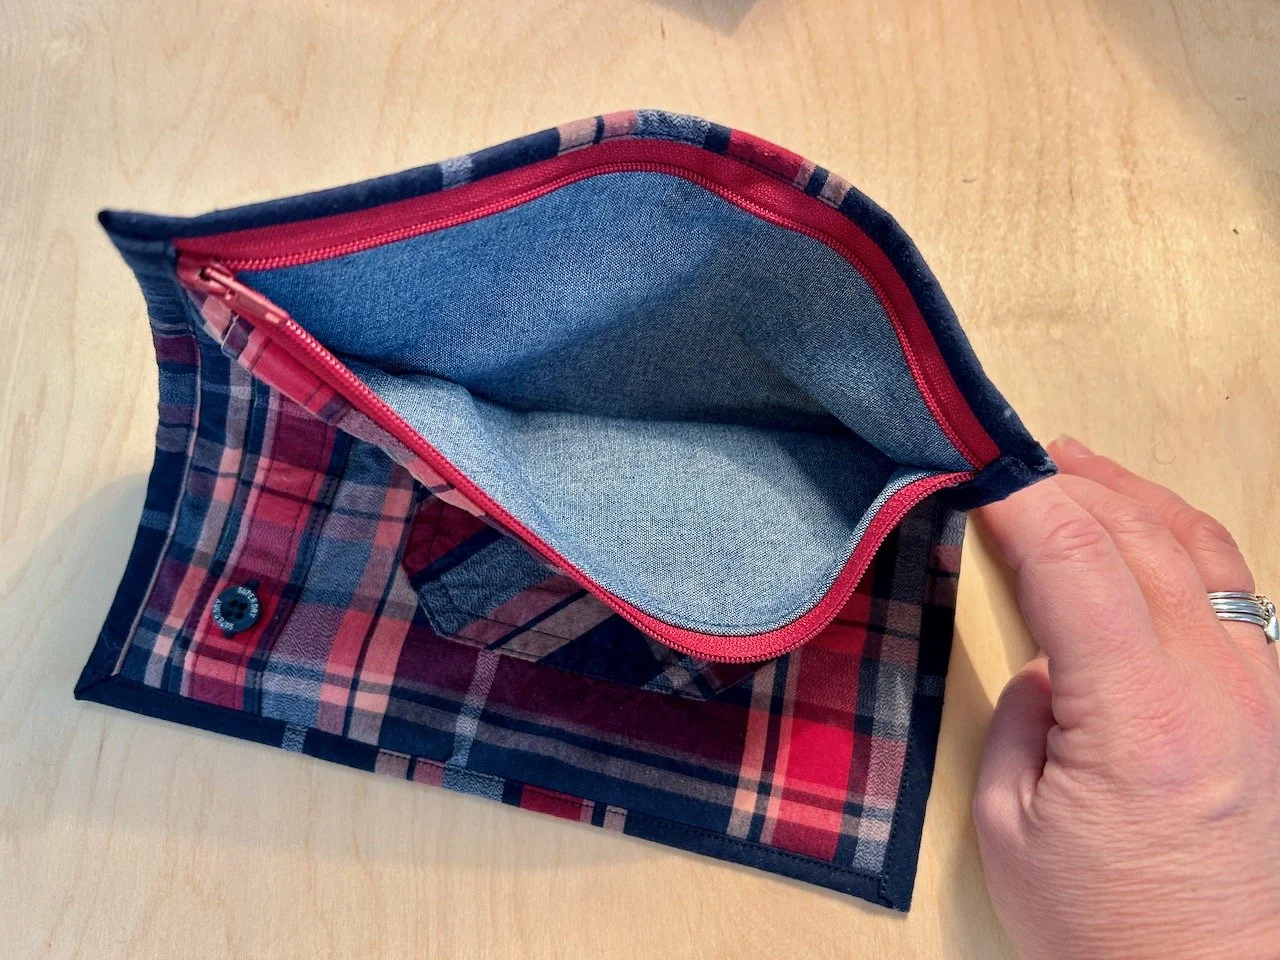
For this one I used an old denim chambray shirt (also MOH’s) for the lining - again not taking any chances on the material choice, and you never know it may even get used.

A flamboyance of flamingos

That’s actually the proper name for a group of flamingos, isn’t that great? Almost as great as this set of pouches I made for mum who has made, and continues to make, me many pouches which I’ll never complain about. Mum was quite taken with the flamingo pouch in the original stack of pouches, and so I thought with my newfound size knowledge I could go flamingo mad (or plamingo mad as they’re sometimes known in our family).

And so I did.

With four more pouches! Each fits inside the other - and so it was a tropical flamingo pass the parcel for one - what’s not to like?

Noughts and Crosses - another quilt completed

Around the same time I shared my Flying Geese quilt I saw another quilt which I fell in love with, this time the Happenstance quilt by Sarah Hibbert - isn’t it beautiful, and well, curvy!

Immediately my mind was making all sorts of plans, and that’s before I even knew if I could sew a curved block. The plans went on hold (briefly) and I thought I’d better try it out as I was sure I had an orange peel template hanging on my craft room pegboard - I remember having fun balancing them across two hooks.

And sure enough I did, so I dug out some flowery material from my stash and tried to work out if I could sew a curved block.

I started small, although I had a plan to go large (well medium) and so my test block was all the patterns. And it worked, and wasn’t too onerous at all - even with all the pins. I think the key to this curved sewing, was to take it slowly - and to be honest, all the pins meant you couldn’t go fast anyway, as sewing over pins isn’t recommended.

With a few successful curves under my belt, the larger more medium plans were well underway.

This time though along with all the patterns there was also a plainer fabric - for some blocks this would form the outer square, and for others the inner circle - that meant I could use all of the material I’d cut, so a great way for me to use up some materials I’ve had in my stash for quite a while.

With the curved blocks sewn, it was time to work out a layout. I knew that I had some blocks left from my Great Granny Square quilt and once I’d played around with the placement for a bit I had a plan, and it wasn’t the one I first thought of, but this does remind me of Noughts and Crosses hence the quilt’s name.

Initially I thought I’d have the square - or crosses blocks - diagonally across the quilt, with the curved blocks in a triangle shape either side, but what worked in my head didn’t work so well in real life - and this was the layout that I was most happy with.

And that’s how this quilt stayed for most of December and a fair bit of January, and I’m not sure why as it was mostly done. This week I’ve completed the scrappy binding and managed to photograph it in pretty much the same position as the Flying Geese quilt!

Like that quilt, my plan is to donate this quilt to Project Linus UK, a charity whose mission is to provide love, a sense of security, warmth and comfort to children, who are sick, disabled, disadvantaged or distressed through the donation of new, homemade, washable quilts and blankets. 

Again it isn’t perfect, but it is done and perfectly acceptable - plus it’s formed another slightly larger plan (more on that soon) and made me realise that the Happenstance quilt is also perfectly do-able. Of course I have a plan for that too, I just need to work out when, and how - as ever!

PostCommentLove

A mandala pouch for my poppers

Since I shared the stack of vinyl pouches with you, pouches seem to have overtaken my life, which is a little dramatic I know. But I seriously have a bad case of Pouch Love!

This isn’t new to me, I’ve known I’ve had it for a long time - but what is new is that now I’m creating my own, and my answer really is ‘oh I need a pouch for that’ whatever the question. I’ve a few ready to share with you so will start to do that over the next few weeks, and don’t say I didn’t warn you.

This one though is both practical - it’s already in use - and had made use of two of the Adult Learning courses I did last year. This combines a print from the Indian Block Printing & Stitch course, along with the skills I picked up in the Bag Making course - most notably zips.

Though for all of the pouches I’ve made so far, I’ve still not switched to a zipper foot, so I think I probably should add that to my ‘to conquer’ list for this year, but back to this pouch.

It started off as a neon pink printed mandala on the cut up frill of an old valance sheet. Seriously.

Quite humble beginnings. At this point not even the edges had been finished on my overlocker - I guess I was keen to carry on printing during the class, and had underestimated just how many squares I’d need so printed and cut as I went!

As for many of the prints that I did in the class I had no real plans for what I’d do with the outputs, I was just enjoying the creative process and exploring the patterns and colours available. After the class finished I made more of a plan as to how I would embellish the prints, or at least chose a colour scheme.

The colour scheme chose me

This was was always going to have an element of teal, and I don’t know why. It’s not a colour I usually go for, though I have since bought clothes that are a similar colour, and I think it goes well with the pink. I was also keen for some of the printing to remain on show, and not to cover it all with embroidery, other than that I had no real plans when I started out.

After embellishing some of the printed area I knew I wanted more teal, and so it seemed natural to enclose it with a circle. And I thought I might turn it into an eye, but as I continued to embroider I decided against that. I didn’t do the outer circles - or at least two of them - freehand, I used a glass vase and then a plate to draw around to stop it all going skewif.

Nor did I use an embroidery hoop, and on reflection I probably should have for this one, as I ended up with more material than necessary in the centre. Thankfully though I came up with a plan for dealing with that - to use wadding to fill the hole, and so creating an almost raised central area. This in turn reminded me of the poppers I’d used on the first pouches I’d made, which the all important tools for were functionally, but not prettily stored in the metallic plastic bag it arrived in.

Now I really had a plan

With that I realised the answer was ‘I needed a pouch for that’ and what better than one with a big circle on the front. It was meant to be! But did I have any material that would match my teal scheme, probably - and as it turns out I did.

I’d bought the Liberty silk remnant during lockdown, along with some other prints which I’d used for some fancy masks, but I hadn’t used this one at all. Now was its time - I even found a complementary zip from the large stash I bought from eBay. The lining is the pale pink t-shirt remnant which I’d saved from a recently retired camisole top. Perfect.

I used the same approach as for the vinyl fronted pouches, but obviously without the vinyl part - and a whole lot bigger. Having made that stack of pouches really helped me out, as knowing how they were assembled meant I could made the adaptations I needed.

And it turned our really well.

Not only does it hold the tools for attaching the poppers - and the spare bits that came with it, it also holds the plastic container full of poppers.

So now when I want to add a popper I just need to go to my mandala pouch for my poppers - which may not always be easy to say, but it sure is easy to find!

PostCommentLove