Repurposing my autumn wreath

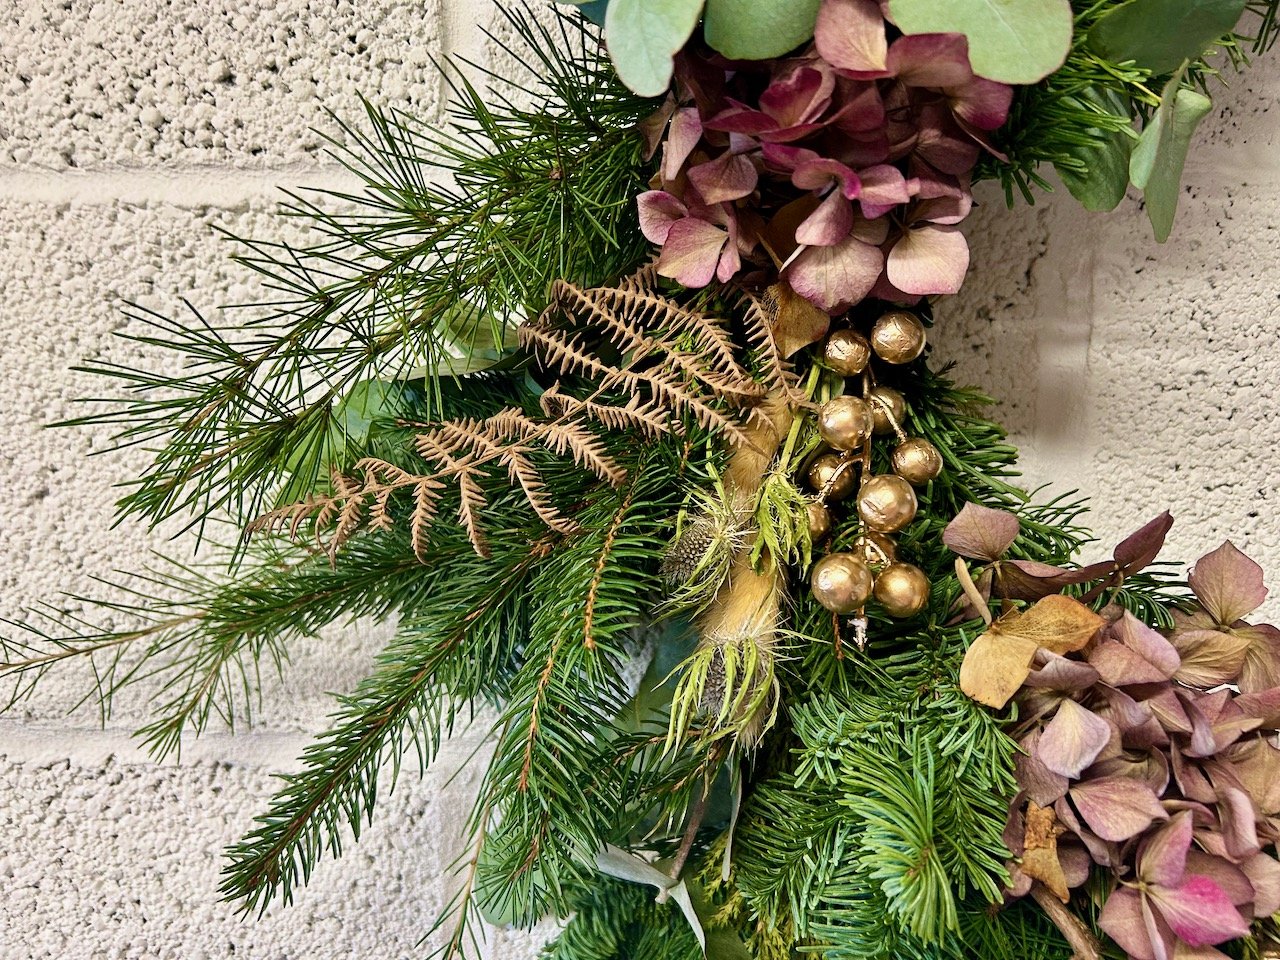
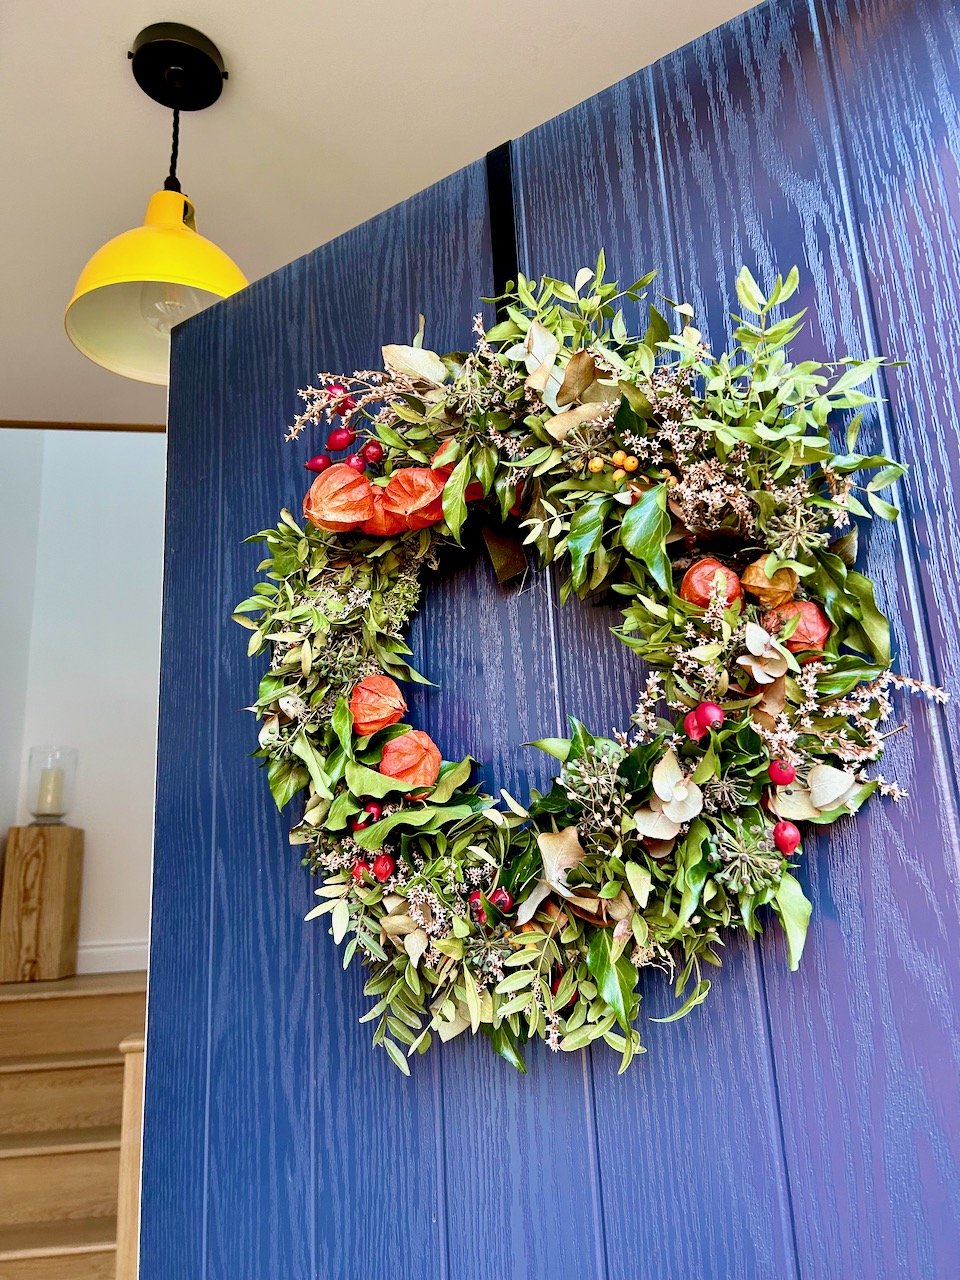
17 October I went to a workshop to make my autumn wreath, and almost a month and a half later it was still looking pretty respectable, if not slightly weather worn, which given the weather we’ve had - rain, wind and snow - isn’t surprising! And with a new workshop, and wreath, booked in for the start of December its days were numbered.

My autumn wreath fading a little on our open door

And while the autumn wreath was fading, it wasn’t completely done - which was just as well as I had plans for it.

Back in 2016 I shared how I’d bleached some pine cones, and how my top tip was to start early - I think I took my own advice there as I’d not used them properly, so by my reckoning eight years is plenty early enough!!

This year was going to be their year

At least I hoped it was.

I brought in the autumn wreath as by now the weather was too chilly to do this outside, and was immediately grateful that I thought to put this on a towel and on paper. It was wet from the recent rain, which was no bad thing as keeping the moss wet helps. The towel soaked some of that up, and the white paper helped easily identify bugs crawling out of it.

The autumn wreath on my kitchen worktop, plus towel and paper, before trimming the most faded elements.

I snipped off the Chinese Lanterns and some of the more faded greenery and the berries which were past their best, but left as much as I could.

To check the viability of this primping project, I placed my bleached pine cones around the wreath to check I had enough to fill the gaps. I did. So with more optimism than skill I set about wiring them into place. I had thin wire so I think this was harder to use than the thicker short lengths of florist wire which could be more easily pushed through the moss, but I go there and all the pine cones were attached successfully.

It doesn’t look too bad laying down does it?

I knew the proof of the pudding, or at least my newly acquired wreath making skills, would come when I held it vertical - and thankfully none fell off, so I could move to the next phase of the project - putting it on display.

The primped autumn wreath with newly acquired pine cones attached to our gate

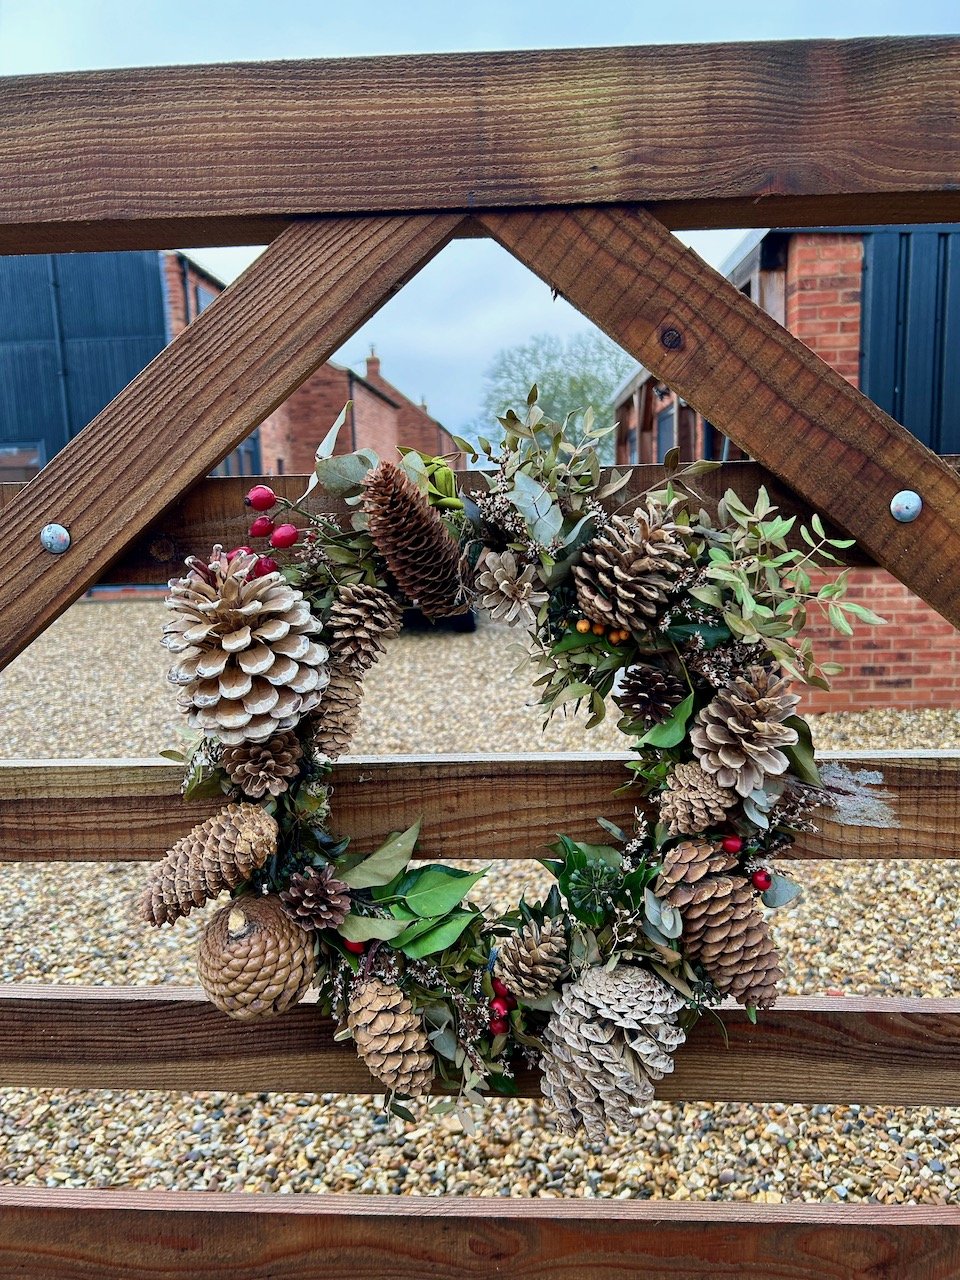
Not taking any chances with the wind gusts, I’ve tied this on in four places - top, bottom and both sides - and it’s stayed on the gate, so far. What’s more, the pine cones have also stayed attached to the wreath, so I’m calling that a win - and a pretty and sustainable one at that.

Though this will be its last stand, with the majority of it heading to the compost bin (actually our brown bin as we haven’t sorted new compost bins yet) in the New Year. I’ll be saving the pine cones, and if I can the metal ring, but you’re not surprised by that are you?

This is likely to be my last post before Christmas, so thank you again for continuing to read and support my blog. I hope you have a great time over Christmas celebrating and/or spending time with families or loved ones, and doing what’s important to you.

We’re looking forward to spending the Christmas period with family in our new home. I hope to share a post of my Christmas wreath before the New Year, so I’ll save wishing you a Happy New Year until then.

Fusing some Christmas trees

I seem to have a thing for Christmas trees for my handmade cards. I’m not sure why, but at least I’m consistent! This year my cards were totally inspired by The Sweet Stitches - do go and check out some of her reels on Instagram, they’re amazing.

I’m pleased with how my cards turned out, and while I started much earlier than normal as I was keen to get my cards posted as they were doubling up as change of address cards from our house move in the summer, I seem to be sharing them here much later!

Yes, with postage costs what they are I have no shame about doubling these up, even though they’re about half a year apart. As it was MOH’s eyebrows were raised when the post office teller gave the amount for twenty four second class stamps, which wasn’t too bad as we’d managed to hand deliver many of our change of address cards to friends on our recent London trip.

But anyway, back to the cards…

Four christmas tree shaped templates with scissors alongside them on the small white round table, the tree templates are on a blue circular coaster

I started with some templates, four for good measure. I think that’s why I keep coming back to trees, their shape is pleasing and like nature, there’s room for some variation each time, I’m not one for being rigorously contained - and that goes for trees too it seems!

I had scraps of fusible interfacing as well as plenty of scraps of material. I kept my palette pretty simple - reds and greens, and the snowflakes on my red Christmassy fabric was a bonus.

On the scraps of single sided fusible interfacing I drew on some Christmas tree shapes - for my test I tried different pens ranging from a Sharpie, to a regular biro to a pencil, and all worked perfectly fine. I mostly continued to use the biro as it was easier to use and was easily visible from the other side.

The fusible interfacing side up with the tree shapes drawn on, on my crafting mat
The reverse - and patterned side - of the image above, small snips of reds greens and snowflake material

I ironed on small scraps of fabric which I’d cut into random shapes. These were quite small, and that was on purpose as my templates were pretty small too. The trick here is not to overlay the fabrics too much (as they won’t stick) and not to get too stuck on (pun intended - sorry) covering every part, though seeing where fabric covered the template was useful.

The four colourful and multi coloured trees cut out - and a pile of trimmings alongside them on the craft mat

Cutting them out was more enjoyable than you might think. Seeing that pile of trimmings grow and the trees take shape was satisfying, and I was keen to check the size on my card blanks.

A single tree laid onto a brown craft card - trying for size!

It was simple, but it worked for me.

So the tree production started.

Every one different. Every one unique.

tree production - two rows of five trees and a row of four below on my craft room desk

If you looked at my Instagram inspiration then you’ll notice a very obvious difference. Mine don’t have the top stitching, well one does - I tried it and my shapes were too small and too intricate for my machine. So I need to work on that, or at least work out if free motion embroidery is an option for my machine!

Instead I added little diamante studs to the end of each branch and a star on top, which worked a treat.

Now I’d love to show you an image of a final card, but somehow in my keenness to get them to their recipients I don’t have one - not sure how I managed that, but take my word for it the sparkles definitely finished them perfectly.

I’ll be trying more of this technique next year I’m sure - my learning is to try bigger shapes and bigger scraps, and hopefully I’ll be better at photographing the end result!

Creating a space to craft

As part of our move from London it was important for each of us to have a ‘day space’ and for me that was a space to craft. It didn’t matter what part of the house it was in, but I was keen for it to be in the house rather than say an outbuilding (purpose built or otherwise) in the garden. I know that on the colder days I’d be tempted not to venture out, and heading upstairs would always be preferable.

But the main thing for me about having a dedicated craft space was to have my craft supplies together and organised. As a spoiler to this post, my craft supplies are together but not yet completely organised, but I’m confident that will come!

Previously I’d stored my crafts between at least a couple of rooms, and having them together felt like the ultimate luxury. Before we moved I toyed with the idea of an adjustable standing desk, and at one point one of those clever storage cupboards where the doors fold outwards and a crafting heaven comes into sight.

In the end I opted for neither of these, but nabbed the fourth bedroom which I’d earmarked from the very first time we viewed our new house. It’s the same size as the third bedroom, but importantly the room I nabbed has a built in cupboard, and as any crafter knows, storage is king.

It’s taken me a few months to get my space to where it is now, and I’m sure it’ll take a few months more to fine tune it but I’m back crafting. And I’ve many projects that I can’t wait to get started on, and to share with you, but first let me share more about setting up my space.

Three weeks in…

With family visiting in the first few weeks our priorities were to get living - and sleeping - spaces functional, and as a consequence the craft room became a bit of a box store, but I was determined that it wouldn’t fall to the bottom of the list. I was determined to make my mark and get my desk set up, so that’s how I ended up with this bizarre setup.

It didn’t matter that most of the room was full of boxes, that I had no actual seat and that I mostly still didn’t know where anything was, or what I wanted to craft. I had a desk and space to craft if I wanted to, and of course, the perfect excuse to disappear and ‘just sort a few boxes out’ if I wanted to.

The other end of the room was often full of stacked empty boxes, just like this photo, and sometimes there was even a clear path to the door

I knew I had a lot of craft supplies, and this was OK as I also knew that when I moved I should have more time to actually get on and craft. Before my Carpal Tunnel Op I’d bought ten medium sized boxes to pack while I had the use of two hands, reckoning that after my op I’d not have much call to craft immediately anyway. I filled those boxes so quickly though that even I was shocked, and there was still so much more to be packed - which also meant that unpacking would take some time.

We had two eight section Ikea Kallax units that were being repurposed as storage in this room, along with our old Ikea washing basket and the orange legged desk which MOH had used in his office while working from home, and which I’d long coveted!

I naively thought this, along with two slim Billy units in the built in cupboard, would provide all the storage I needed.

MOH looking at the storage space I’d used already and the amount of full boxes still to be unpacked managed to say with a straight face that he didn’t think I’d pull it off and perhaps I should get more storage. Realising he was probably right we soon headed off to Nottingham and Ikea for another eight section Kallax.

And it was absolutely the right thing to do, while they’re not empty there is space to flex and grow - and I’m hoping that I’ll be using supplies too, so there’ll be some natural turnover of stuff.

Starting to take shape

With the right amount of storage, by the middle of August the room was starting to take shape. I’d requisitioned the orange legged desk from its temporary place in the kitchen area as soon as the usefulness of having a desk for paperwork was proven, and quickly realised the advantage of having a double length desk space. Gone was the idea of the adjustable standing desk!

Taking shape - two desks along the left hand side, some boxes under the desks and in the middle of the room, but the blinds are up and the carpet is visible

But just as quickly I discovered the shortcomings of my mismatched desks.

Almost an inch height difference between the two desks
Almost 3 inches difference in the depth of the desks

Yes, differences in sizes. The desks were about an inch different in height, and more like three inches different in depth. I could manage with the tops being different colours, but not the size differences, so I needed a plan B.

Plan B

I thought it would be simple to buy another desk from the same seller on Etsy to match the orange legged desk. Not so, the seller was no longer trading and try as I might I couldn’t find anything similar. A more imaginative response was needed.

I knew I could buy the hairpin legs as this was something we’d looked at before, but discarded for ease when we saw the desk. In the interim I’d also realised my desks would benefit from some drawer space. I had my heart set on some Bisley drawers, initially looking at second hand units on eBay, but without much joy.

Instead after some umming and ahhing these arrived, and I couldn’t be happier.

Two eight drawer Bisley drawer units in orange

I had the legs, and now I had the drawers - all I needed now was the desk top. I struck lucky on the internet and ordered a piece of plywood the same thickness as the existing desk, I opted not to have it bevel cut as I didn’t think the cost of that was justified. I’m not sure I considered myself quite so lucky when it was delivered at seven o’clock one morning though!

The plywood top of my desk standing in the corner of my craft room waiting for assembly

All I needed now was MOH and tools. And I didn’t have long to wait.

Assembling the desk - the corner of the plywood top with the leg and screw being positioned and checked for depth

It wasn’t long before the two hairpin legs were screwed in place and the plywood top was positioned on top of one set of Bisley drawers, themselves balancing on a plinth to get to the correct desk height.

The two desks alongside each other, the new desk has one set of hairpin legs and the Bisley drawers (on a plinth) at the far end

Not only did they look good side by side, but the top down view also shows they’re the same height, as well as the same depth so now I have the continuous space I was after. It gives me space to have my sewing machine out, but also space to use the other desk in anyway I want - whether that’s for pressing seams, or papercraft, or anything else.

I have no excuses now for not being productive, and to be honest I can’t wait to get started in earnest. In September I had my first ‘sewing day’ - or an hour or so at least, and that felts such an accomplishment. I only made some scrap kitchen towels, but the sense of achievement, I can’t tell you.

Sewing machine out, light on the end of the desk along with a completed kitchen towel, cup of tea to the right of the sewing machine and slipper discarded in front of the stool, and a drawer open in the background - a craft room in use!

A sense of order is coming, I’m sure of it!

The more I use my craft room, the more it becomes familiar and the more I remember where I put stuff. Whether I’m making cards, journalling, using my watercolours, sewing, knitting or crocheting - or even just pondering, it’s a space that makes me happy.

With my new friend Alexa alongside me (we’re converts - more in another post I’m sure) bringing all the information, tunes and podcasts I could want, the issue could now be to get me out of my craft room.

I’m looking forward to rediscovering many of the projects I’ve started - maybe even finishing some of them, and starting the new projects on my list and sharing them here in the months to come - look out for details of the Christmas cards I’ve made this year coming early next week.

PostCommentLove