An Easter tea party with home-made Hot Cross Buns

Earlier in the week I received a parcel from Merchant Gourmet inviting me to make some Hot Cross Buns, and not just any old Hot Cross Buns. Their recipe also includes Chestnut Puree and Dulce de Leche, which have to be two of my favourite things ever, so this was an opportunity that I didn't want to miss.

Chestnuts are a long time favourite, and especially my mum's Chestnut stuffing which is an absolute must at Christmas. I really must get her to write it down as even though I've tried to replicate it, I've not mastered it yet.

Dulce de Leche is a newer flavour to me - if you've not tried it, it's like a caramel sauce and delicious. I was first introduced to it at our local Argentinian restaurant who do a stunning dulce de leche bread pudding, and it's always worth trying to leave some room to end the meal on. But as they do delicious morcilla and huge steaks that's always tricky!

Making the Hot Cross Buns

ingredients
mixing the dough
dulce de leche

Unusually there's dulce de leche mixed into the dough; to help ensure this was evenly mixed I stirred it through the warm milk and warm water mixture, and it gave the dough a warm, caramel colour which isn't surprising.

The upper arm work-out

With all the ingredients mixed, it was time for ten minutes of kneading. Its purpose is to stretch the gluten so the dough rises, but it's also good for an arm work-out! It's amazing that after ten minutes its appearance is so different.

before kneading
after kneading

Shaping the buns

The recipe suggests wrapping the dough around the chestnut and dulce de leche mixture but as I think the best way to have Hot Cross Buns is split and toasted I opted to use the mixture once they were toasted.

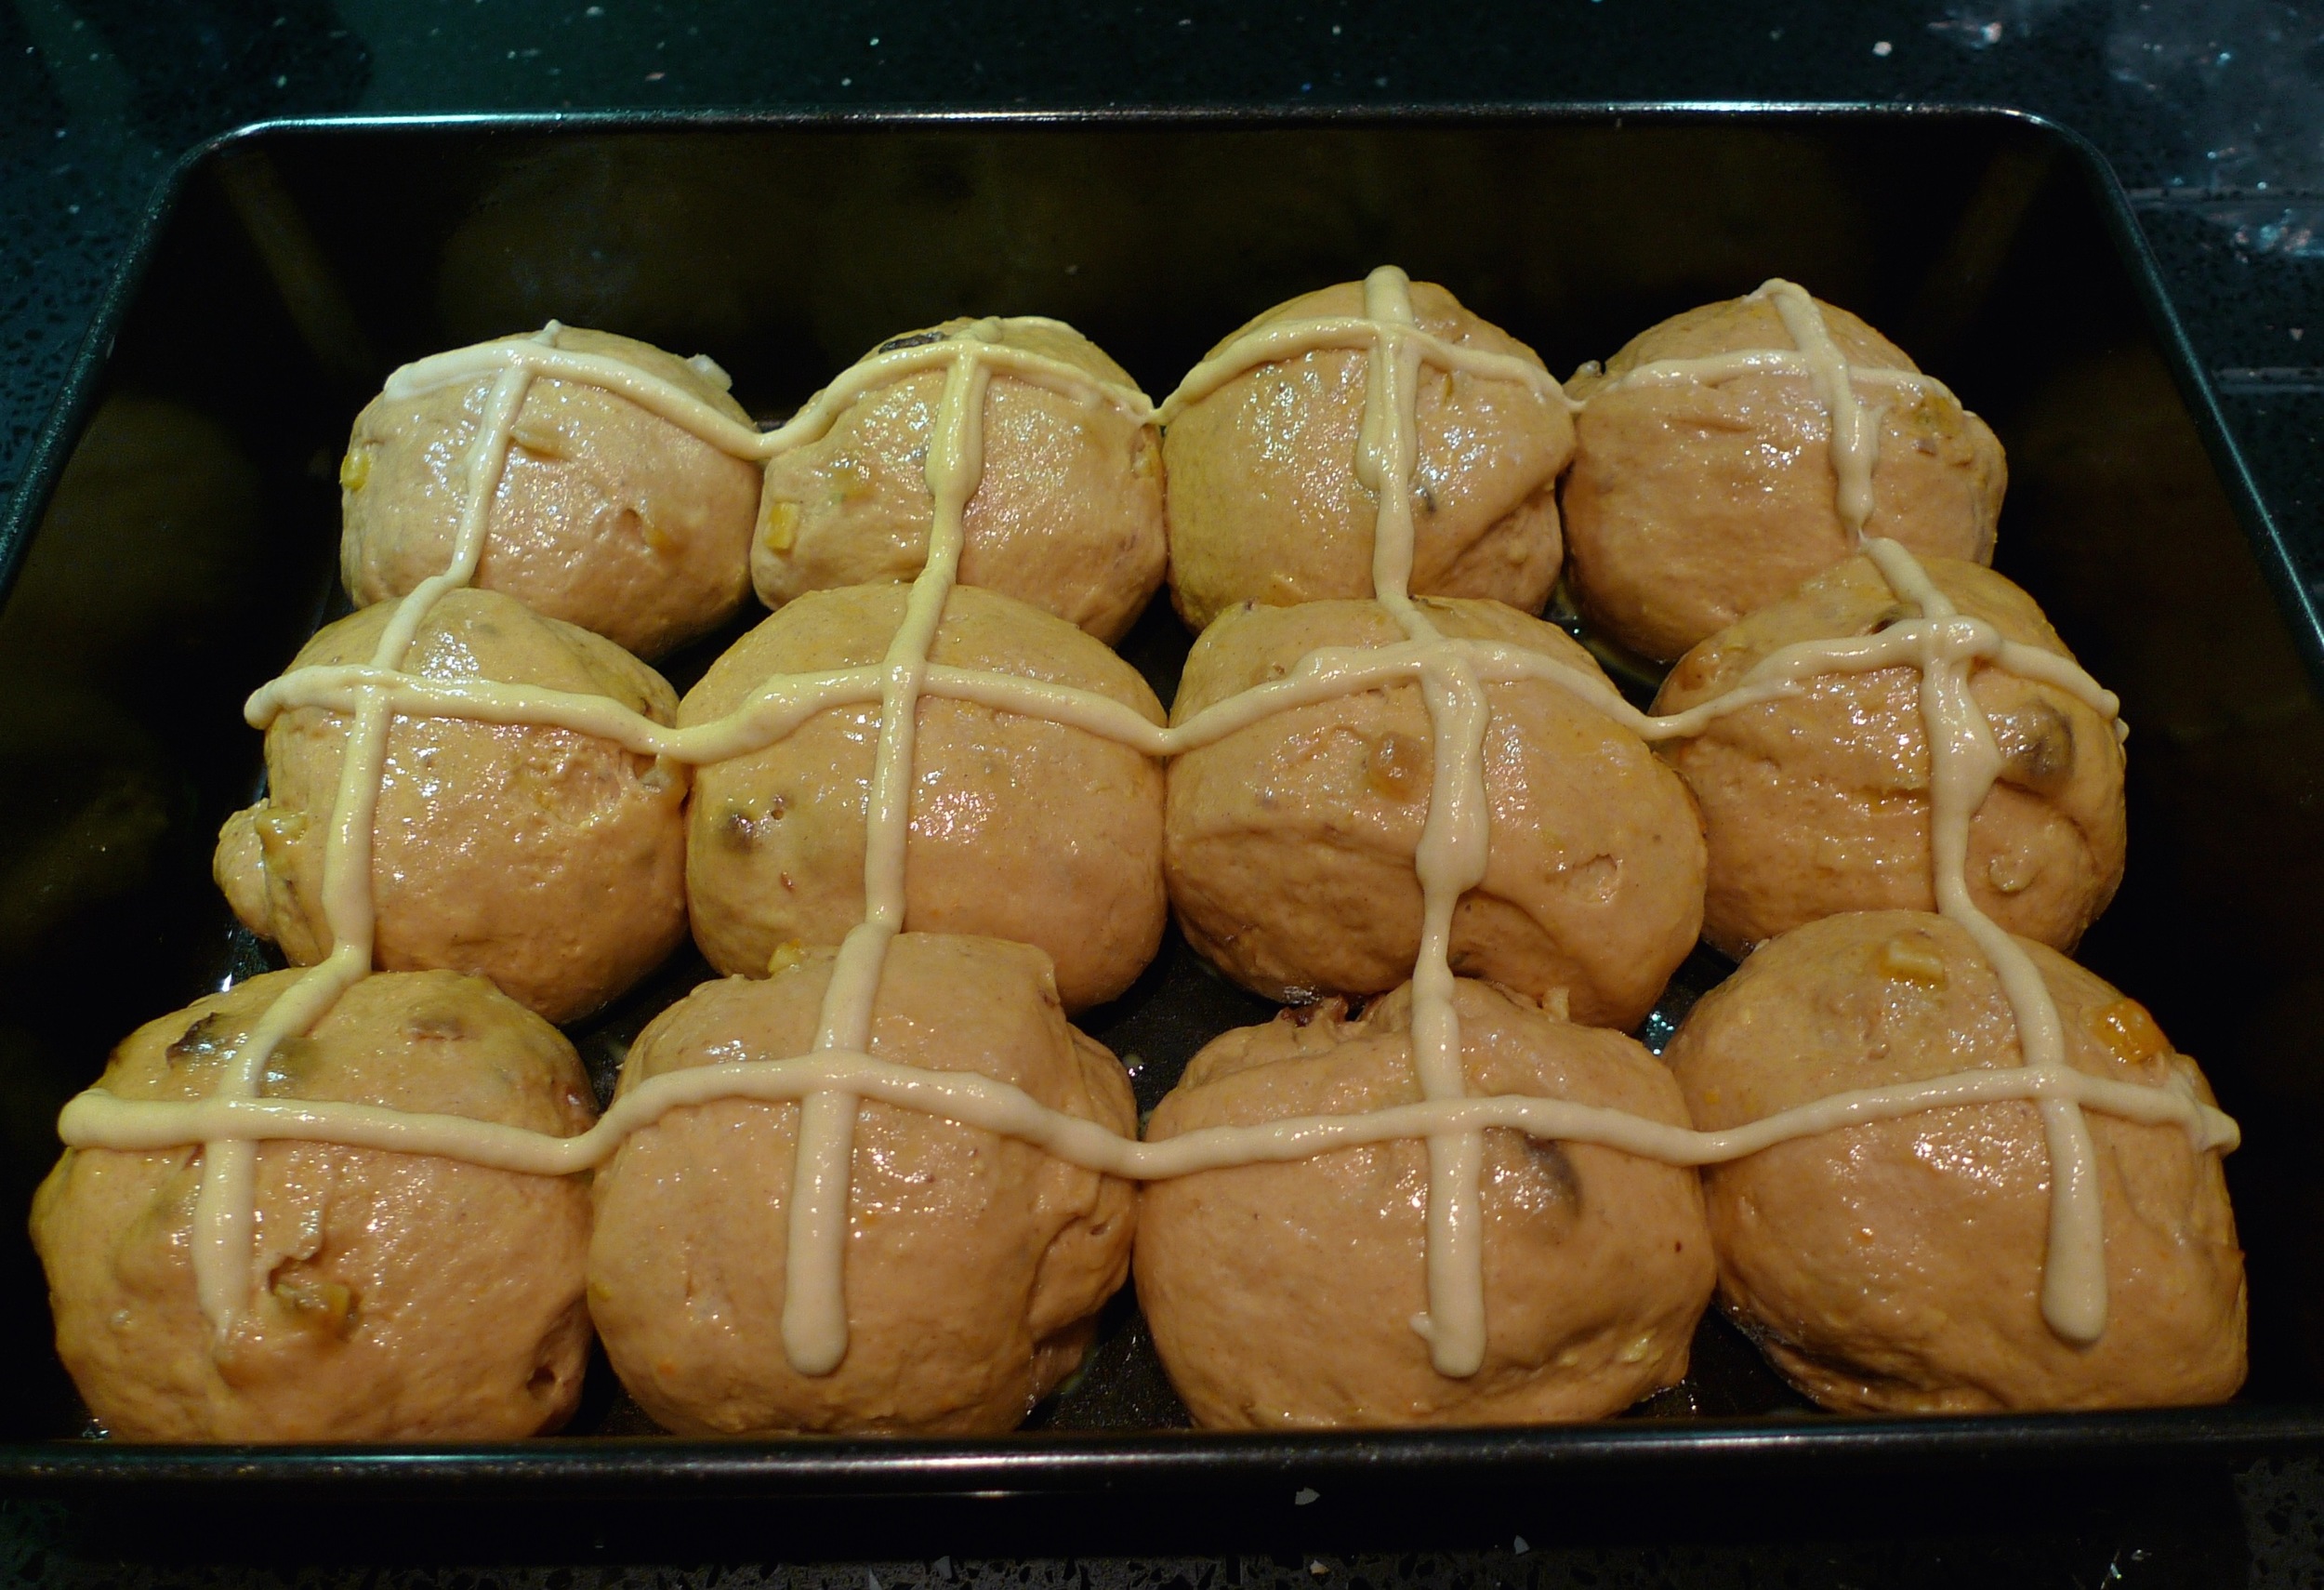
I had some challenges adding the crosses too, although they are my most successful attempt at crosses to date. I'd chosen a piping nozzle that was just too fine and the mixture struggled to flow out. I gave up at the right time and just before the piping bag burst - I wouldn't have been so happy about that. When I tried with a larger nozzle it was still hard to squeeze out, but much easier than my first go.

the second proove
adding the crosses

But when they came out of the oven, they looked great and I was impressed. 

out of the oven

They smelt good too, and we did well to resist trying one straight from the oven!

The Easter tea party 

Well it's (almost) Easter, so Easter bunnies, chicks and mini-Easter eggs were all included. And doesn't it look pretty?  

hot cross buns easter tea party

And yes, that's a tea cup full of mini-Easter eggs, I didn't want my tea getting cold.

easter bunnies & hot cross buns

The Hot Cross Buns were tasty too, they kept their caramel flavour and MOH thought they were the healthy brown sort, but the colour has come from the dulce de leche. They tasted better than the shop bought ones do, they had more about them if you know what I mean.

easter eggs and hot cross buns
easter chicks
easter personified

How do you like your Hot Cross Buns?


This is a collaborative post but all opinions are my own.

Flour +Water +Salt = Sourdough

I started to make my own sourdough bread regularly a couple of years ago, and it's become second nature to make a loaf. It sounds complicated and let's be honest a bit of a faff, but really it's not - in fact I think it's easier and involves less effort than making regular bread.  And there's no kneading involved.  However this year, up until now I'd lost my bread making mojo, which I'm putting down to the trouble I've had with my split tooth.  Thankfully that's now repaired and I'm enjoying eating proper bread again.  I've decided to share my sourdough bread recipe partly as a record for me and partly to show you just how easy it is. It's the kind of recipe that I usually do from memory, but as I'd not been making it quite so regularly I found myself having to check on the quantities, so where better than to record it than here!

The ingredients you'll need are:

  • 250g bread flour (plus extra throughout the recipe)
  • 50g Rye flour (plus extra for feeding your starter)
  • 8-10g Salt
  • 300g Sourdough starter
  • 150g tepid water 

That's it.  Here's the equipment I start off using.

1. Weigh the 250g of bread flour and the 50g of Rye flour into your mixing bowl and add your salt.  I don't tend to weigh this and give the table salt container a confident slug around the edge of the bowl. Don't be tempted to skip the salt as you need it for flavour.

2. Next weigh 300g of your sourdough starter in the jug and then add 150g of tepid water - yes weigh the water too.  Give it a stir so it looks like lumpy porridge to help with the next step.

3, Pour all of the liquid mixture into the flour and mix until all the flour is mixed in and a rough ball of dough forms.

4. Now cover the bowl and leave it somewhere warm for 30 minutes or so - it doesn't have to be exactly that, it's pretty forgiving.  I use a shower cap to cover my mixing bowl, it's reusable and greener than clingfilm and it's a great excuse to stay in a fancy hotel every now and then.  For me my warm place for bread is on top of my toaster under one of the under-counter spotlights, but any warm place will do.

5. After 30 minutes or so, you'll need to turn your bread.  I use a flexible dough scraper (which is also good for scraping pastry or kneaded bread off your worktop) for this - they're relatively cheap at around £3 and make this a lot easier.  You need to get the scraper under the bread and lift the bottom to the top turning the bowl as you go so you work all around the bread.  You need to turn the bread like this about 20 times - you'll notice that it looks a lot more like dough now.

6. You can repeat step 5 but I don't always do this and the bread turns out just fine.

7.  Then it's time to give the bread its second rising.  This is a much slower affair and can be done in the fridge overnight.  It's traditional to prove sourdough in a banneton, and if I'm honest it does give the bread a better exterior and shape but it's not essential and if I'm pushed for time I'll leave it in my pyrex mixing bowl and that works too.

If you're doing the second prove in the fridge it'll take between 12-15 hours, if you're doing in in your warm spot it's about 6 hours.

You can see in the reflection below just how much it's risen in my warm spot - and with very little effort from me!

8. To cook, heat the oven to its hottest temperature and place a small bowl of boiling water in the bottom of the oven to create steam and help the crust develop.  If your bread was in the fridge let it come to room temperature for about an hour before cooking it.

9. Sprinkle a baking tray with flour and turn out the bread onto the tray.  You'll need to slash the top of the loaf - I use a lame, but a sharp knife will also work. This allows the bread to keep its shape while cooking.

10.  Cook for 30-35 minutes until there is a thick, crunchy crust and it sounds hollow when you tap the bottom.  I find it helps to turn the loaf over at around 20 minutes and cook it upside down for the last 10 minutes.

11.  When it's cooked, I transfer it to a wire tray or a breadboard to cool and cover it with a tea towel.  Taking it off the warm tray avoids a soggy bottom and covering with the tea towel prevents the crust from going too hard.  

And if you can leave it to cool for 10-15 minutes before cutting into it!

Sourdough starter

There's a wealth of information online on how to create, feed and refresh and even how people name their sourdough starters!  Mine doesn't have a name, unless it's been particularly active and has exploded over my new fridge - it did that once, but clearly knew that wasn't a popular move as it's not done it since!

Because I make a sourdough loaf usually at least twice a week I don't feed my starter as such, I just replenish it.  The idea of throwing half of it away every few days didn't sit well with me and when I first started out I had tubs of the starter fermenting away because I just couldn't bring myself to do it!  I went to a bread making class and as part of that I left with a small starter which has been remarkably easy to keep alive, even after holidays. I store mine in a litre ice cream container and the majority of this is used when I make a loaf so I simply add a cup of Rye flour and a cup of tepid water and mix it until no flour shows before storing it back in the fridge.

So that's how I make my sourdough recipe.  I think it tastes far nicer than any shop bought bread and while it takes a fair amount of elapsed time, there's actually very little effort involved, so I think it's worth it. What do you make regularly that you no longer buy?

52 Cookbooks 52: Onion & olive bread

Number 52, of 52. Woohoo! Well I got there, I've cooked fifty two new recipes in 2014 and used cookbooks that previously just sat on the shelf gathering dust. I've had fun rediscovering those books too, but more on that another time. First though I have to share the last one of this challenge...

This week I've chosen a niche cookbook, one for cooking in cast iron bakeware it's titled "the cast iron way to cook" and is by Sue Cutts - the more eagle eyed among you will know that Cutts is my married name, but this lady isn't a relation. I do have Le Creuset cookware and I think I've used the book maybe once before, but I really can't remember. So it seemed a fitting way to end this challenge.

image.jpg

What's more I've chosen a bread recipe too, I'm partial to an odd loaf or two and make a sourdough loaf usually at least twice a week. This is a yeast based white loaf though flavoured with onion and olives. The recipe starts with chopping an onion and adding some olive oil before blasting it in the microwave - this is my kind of book! I wouldn't have thought to soften onion this way, but it worked. 

image.jpg

I added the onion and chopped olives to the flour, salt, cracked pepper and yeast before adding warm water, cold milk and a couple of tablespoons of olive oil. Once the dough was together the recipe said to knead the bread for 1-2 minutes, which really didn't seem that long, most bread recipes suggest at least ten minutes. I decided to knead it a bit longer until some of its cellulite-look had gone. Then it was time to shape the loaf and add it to the tin - the recipe is for a Le Creuset terrine dish but I used a non-stick loaf tin instead. 

image.jpg
image.jpg

I brushed the top of the loaf with some olive oil and slashed it on the top, covered it with cling film (usually I use a shower cap for this, but that was already employed on sourdough duties) and left it for an hour and a half to rise.  When I next looked at the loaf it had risen well and was ready for cooking. 

image.jpg

It went into a hot oven for about forty minutes and came out looking like this:

image.jpg

The verdict

- it was easy to make, but used a lot of flour (750g)

- softening the onions in the microwave worked well and I'd do that again. The recipe said black olives but I used green spicy olives as we had some left from Christmas. We had some black olives left too but these still had the stones in, whereas the green ones didn't.  

- kneading bread is very therapeutic so I didn't mind an extra bit of kneading (I don't knead my sourdough at all so it made a nice change) 

- my yeast is a tad on the old side but thankfully it's still working. I was surprised by just how much the loaf rose. If I'm not sure about my yeast I tend to add it to the water before adding it to the flour, that way if it's not going to bubble I haven't wasted my flour. Also half a teaspoon of sugar encourages yeast to do its thing too...

- I'd make it again, especially for a treat, a picnic or dinner with friends. It'd go nicely with cheese and cold meats, less so with jam for breakfast though I think! 

image.jpg

So that's the end of the 52 Cookbooks challenge, I plan to look back over the recipes and the challenge so join me for that during the week, and to find out what's next!